
Google Calendar synchronisation works via an OAuth 2.0 client. First, as an administrator you enter the credentials once; then each staff member connects their own Google account. JoomBook is GDPR-compliant and self-hosted - your appointment data stays on your server (see section 11).
Europe/Berlin) - not UTC. Details in section 9, best checked first.Contents:
- Create a Google Cloud project
- Enable the Google Calendar API
- Configure the consent screen
- Create an OAuth client
- Copy the Client ID and Client secret
- Publish the app to "In production"
- Enter the credentials in JoomBook
- Connect a staff member with Google
- Set the time zone correctly
- Test: sync an appointment
- GDPR note: what is transferred?
1. Create a Google Cloud project
Open the Google Cloud Console and sign in with your Google account. You do not need a paid credit - calendar use is free.
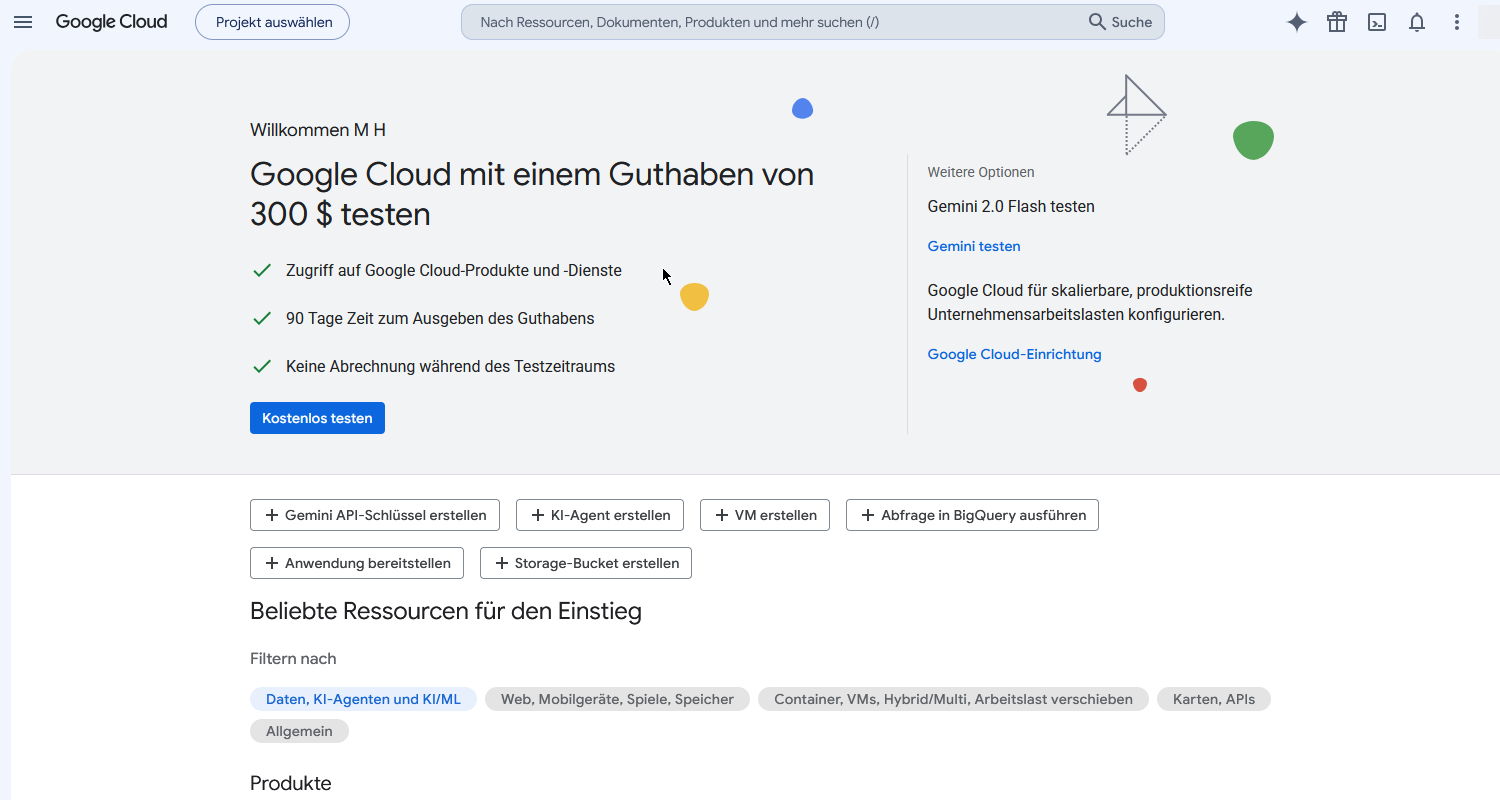
1.1 Click "Select a project" at the top, and in the window that opens click "New Project".
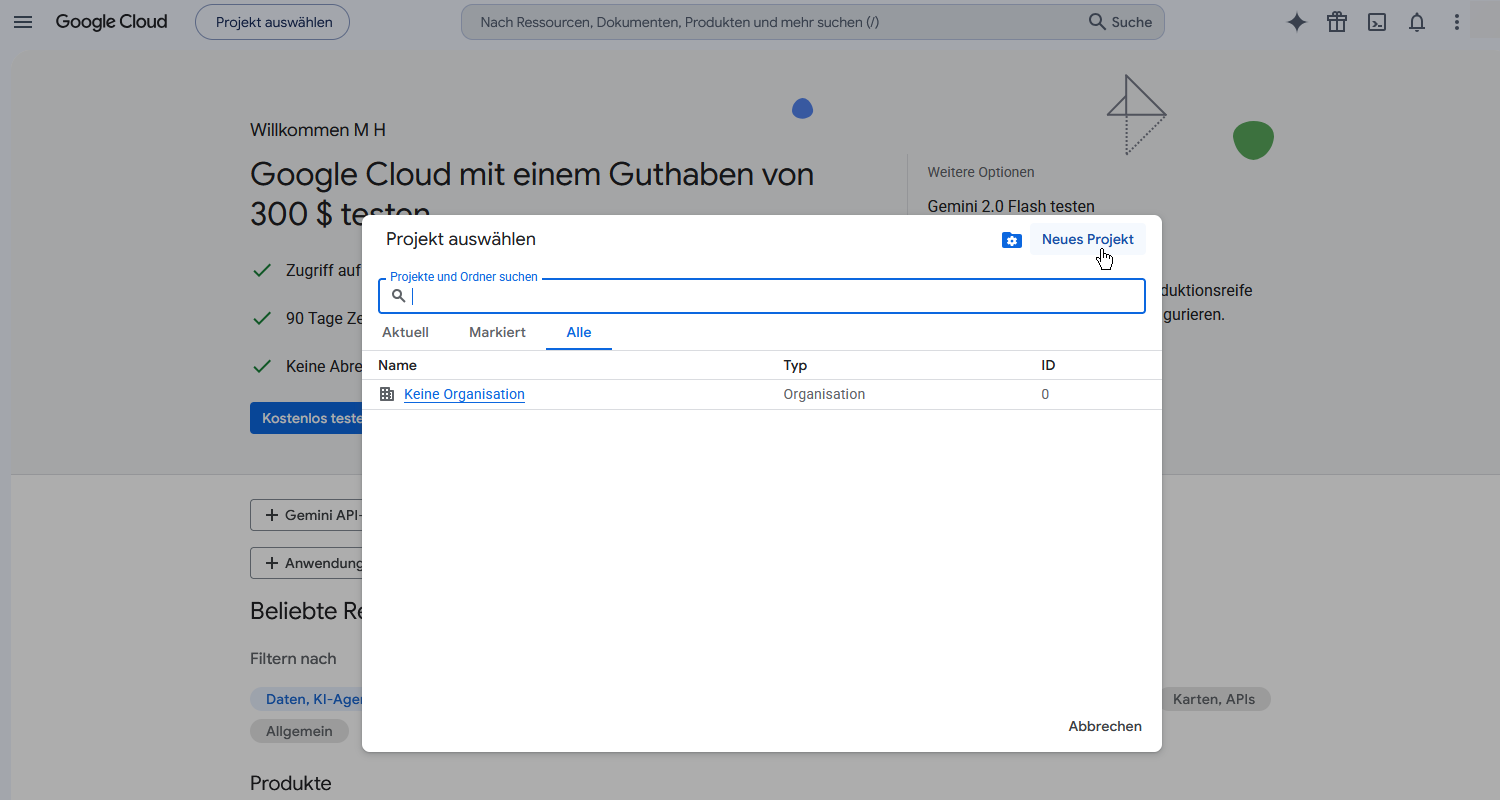
1.2 Enter a project name (e.g. JoomBook) and click Create. An organisation is not required.
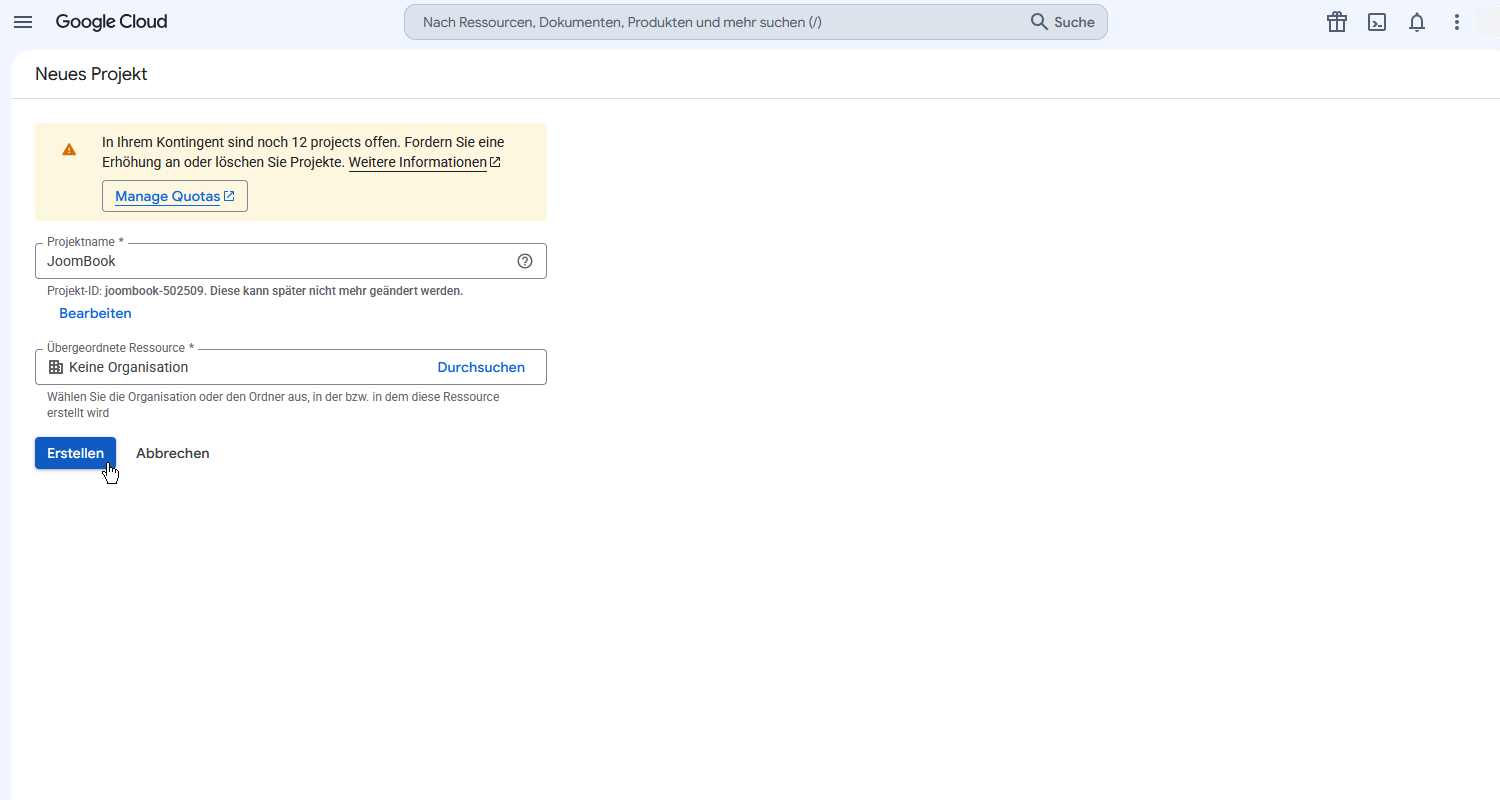
2. Enable the Google Calendar API
2.1 Open the menu at the top left and go to APIs & Services → Library.
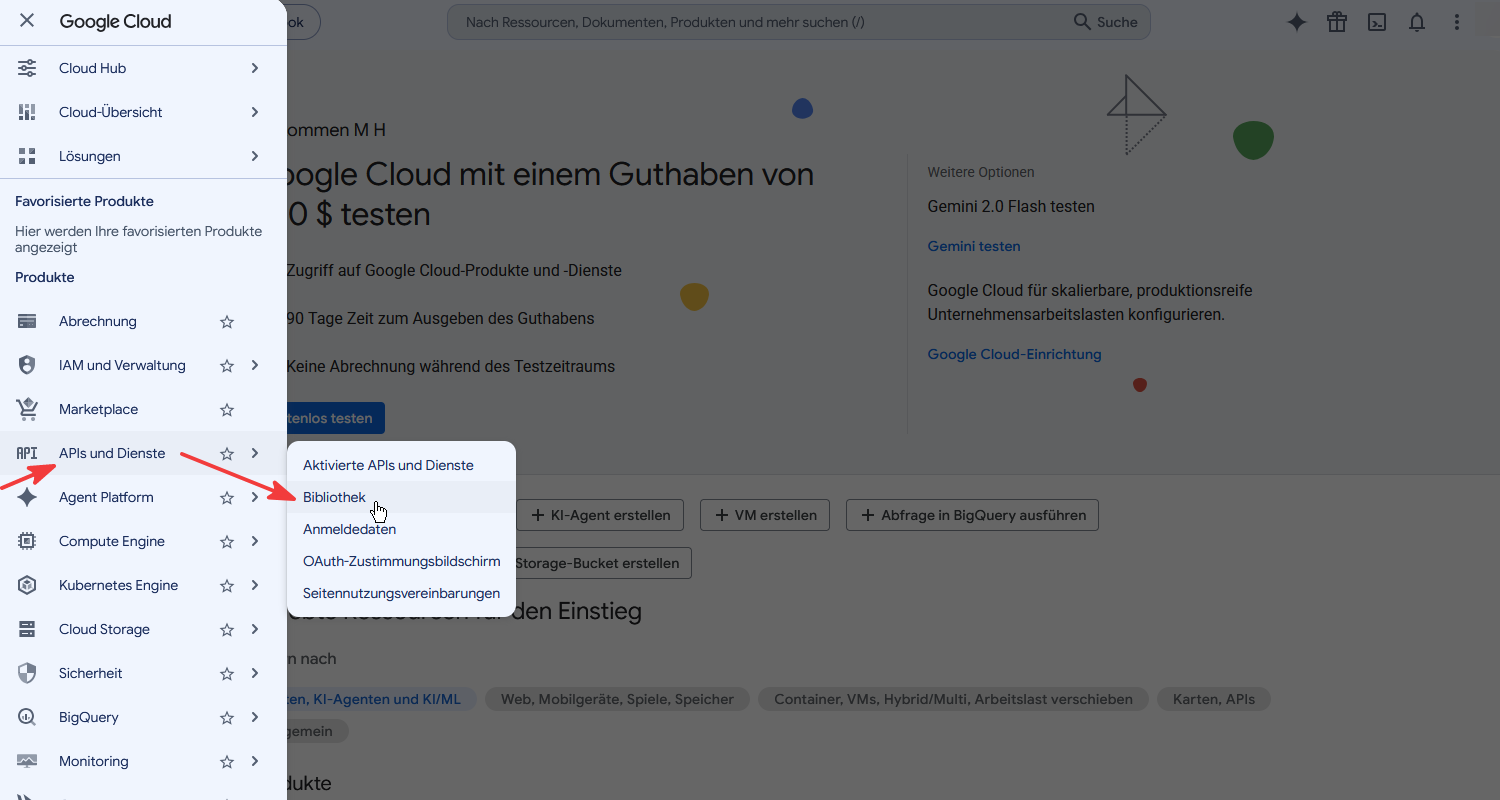
2.2 Search for the Google Calendar API and open it.
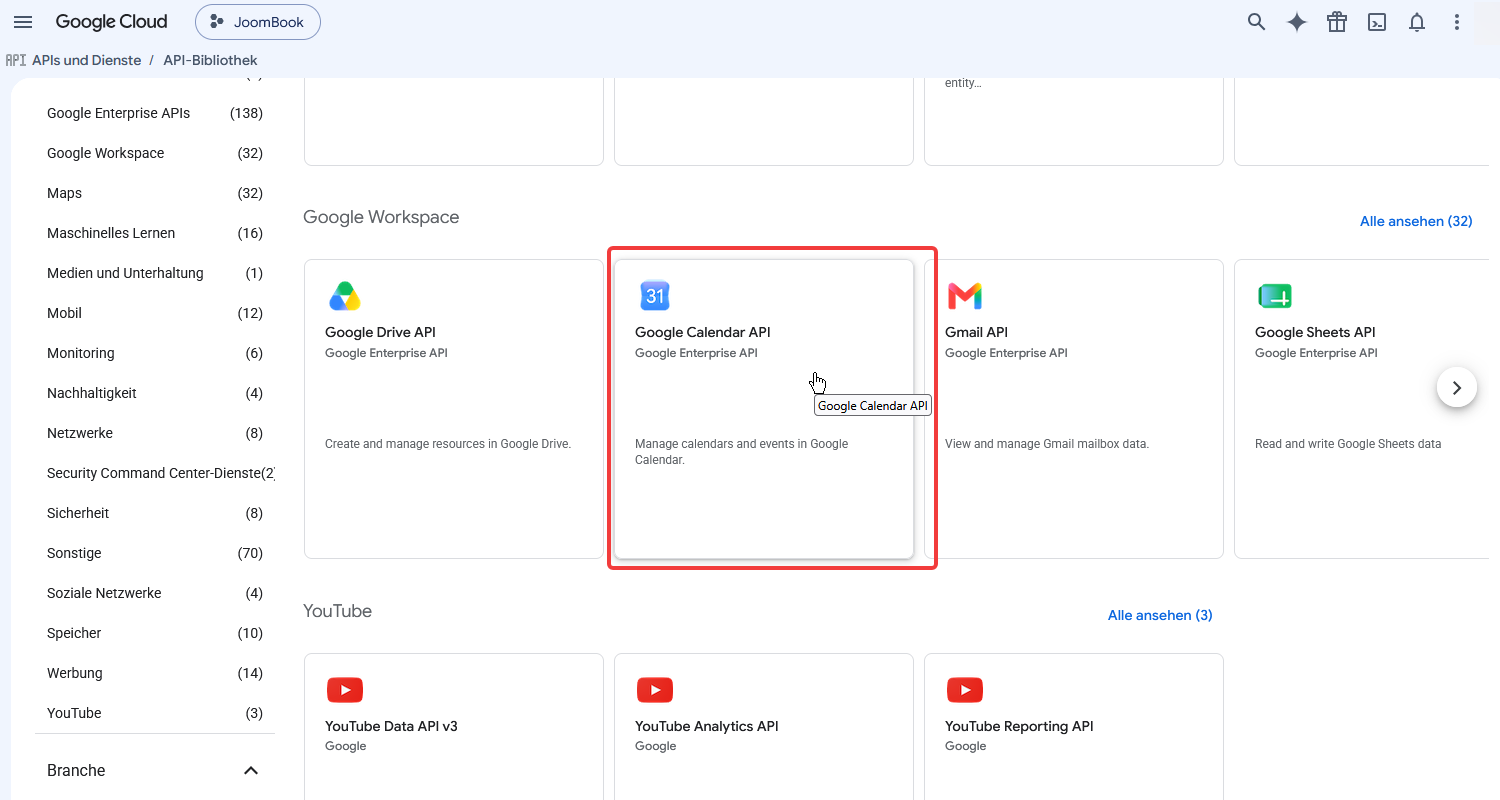
2.3 Click Enable.
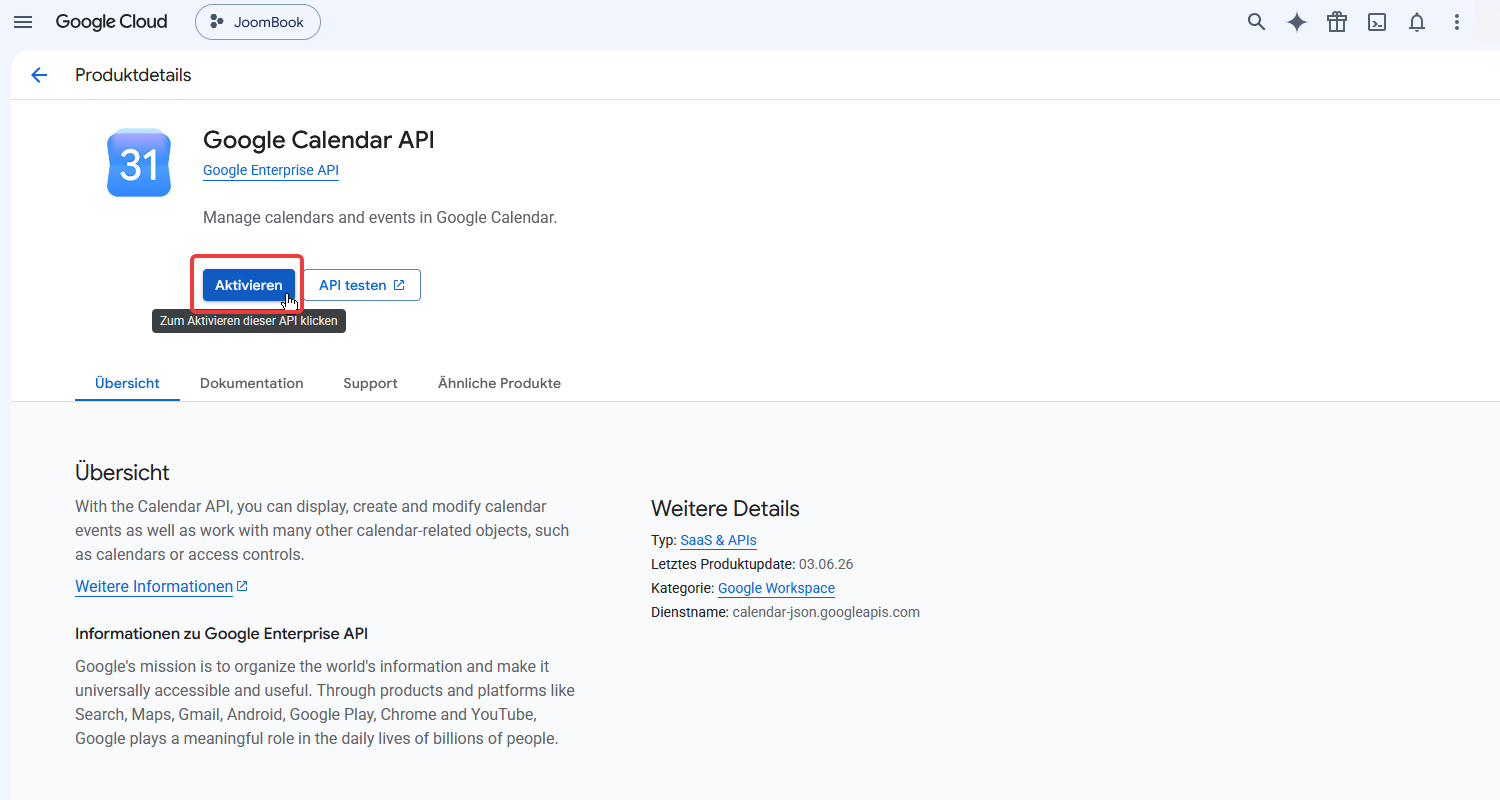
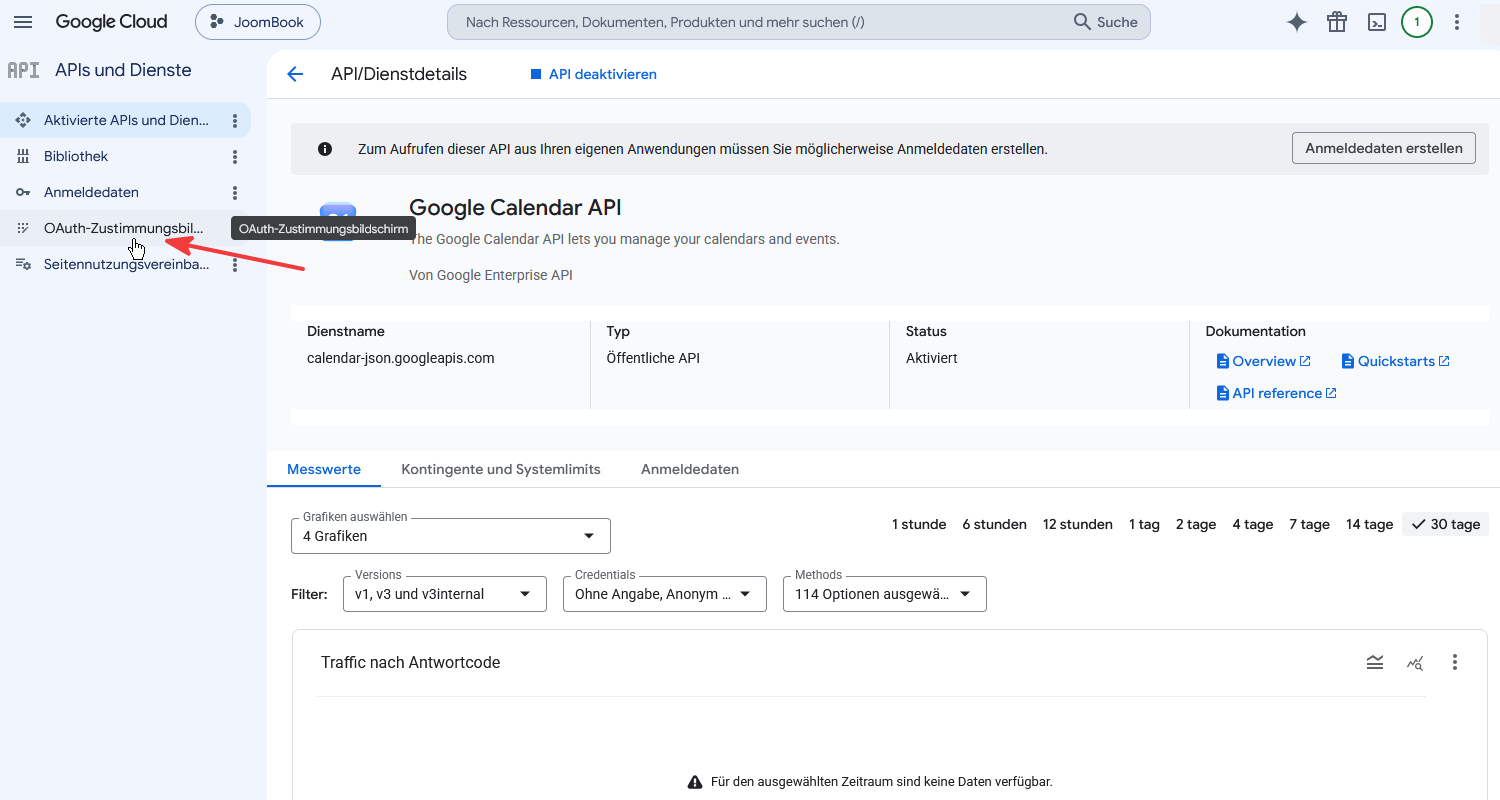
2.4 After enabling, switch to the OAuth consent screen (called "Google Auth Platform" in the new interface).
3. Configure the consent screen
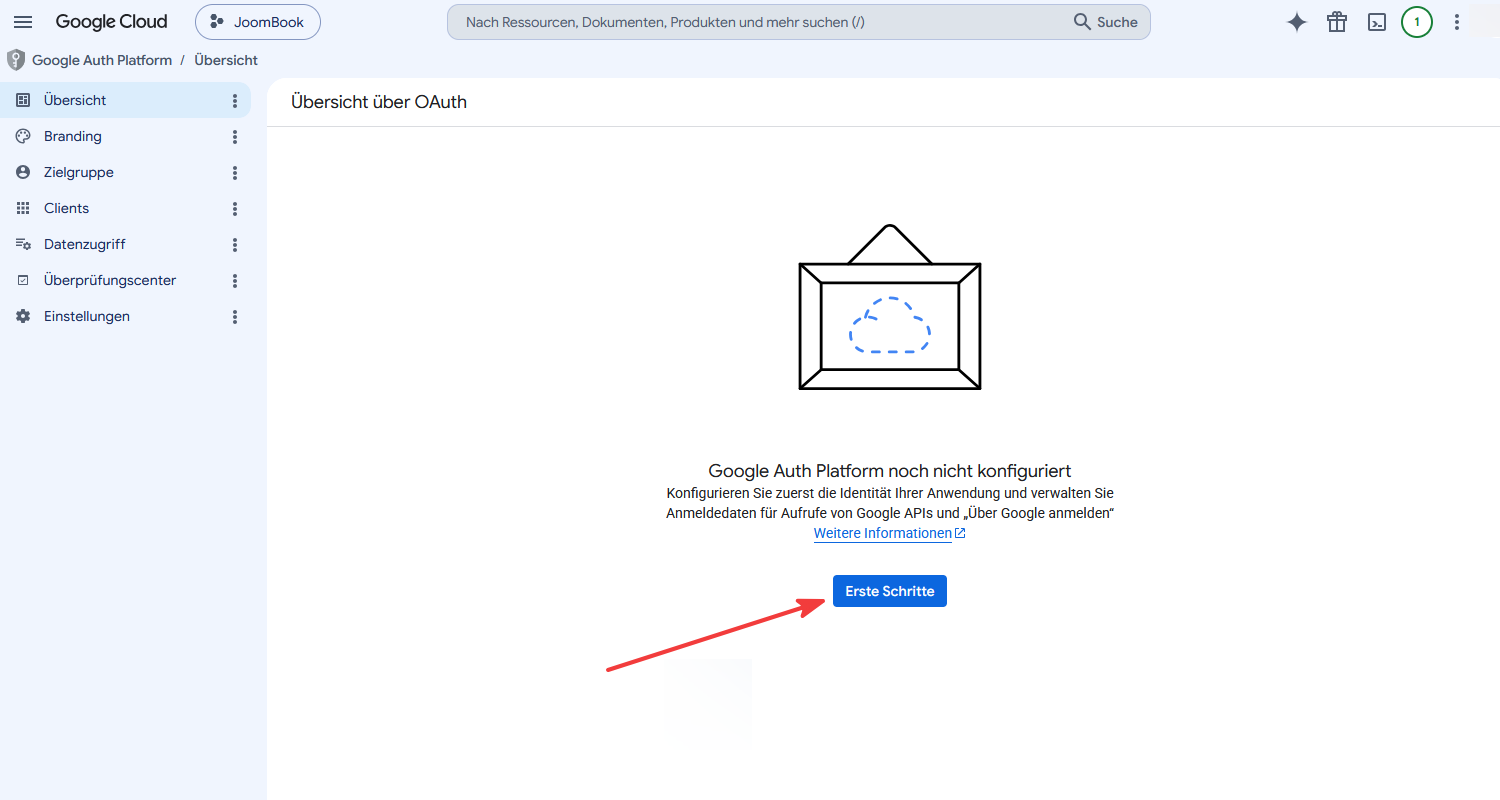
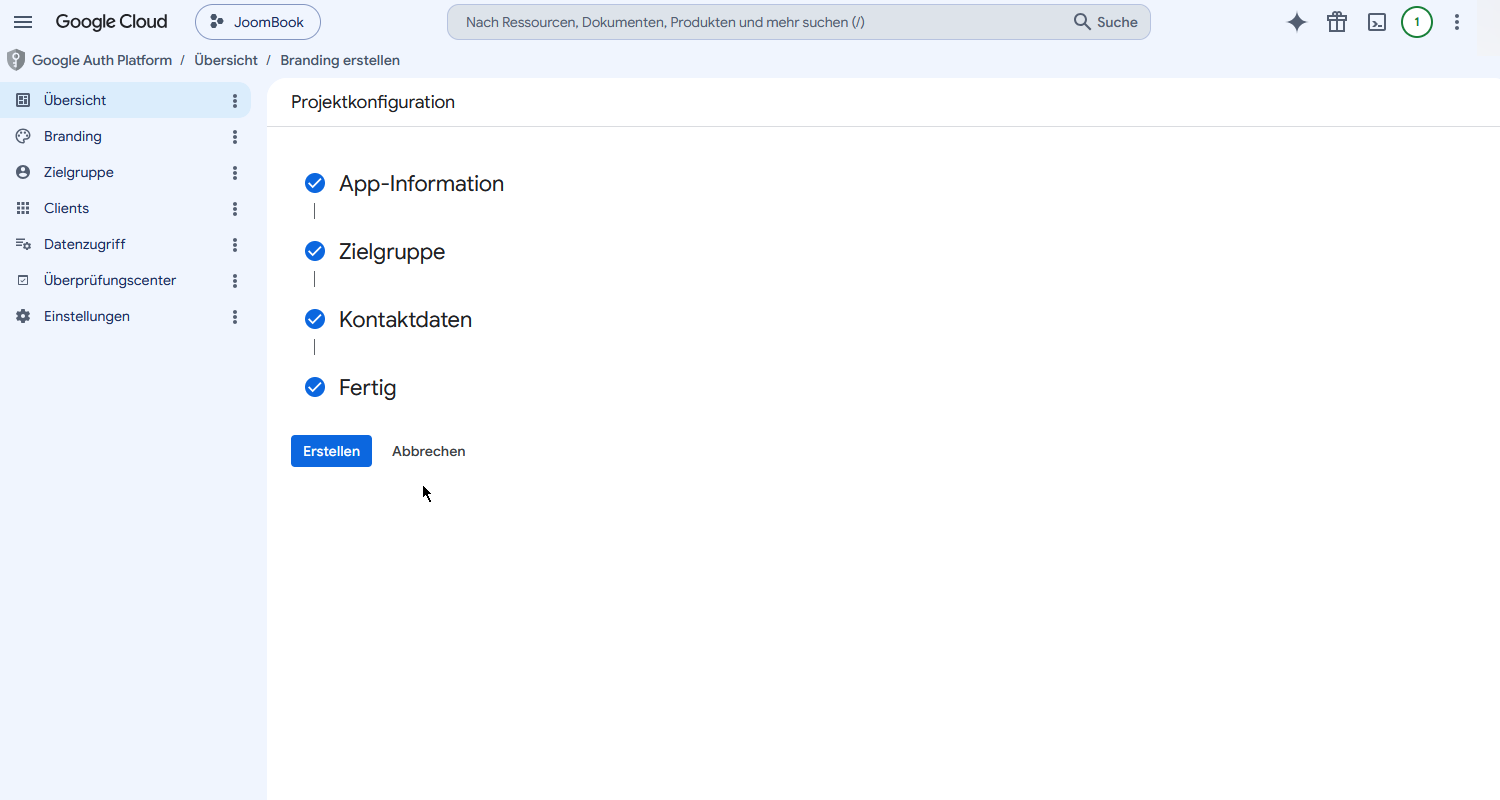
3.1 If the Google Auth Platform is not set up yet, click Get started.
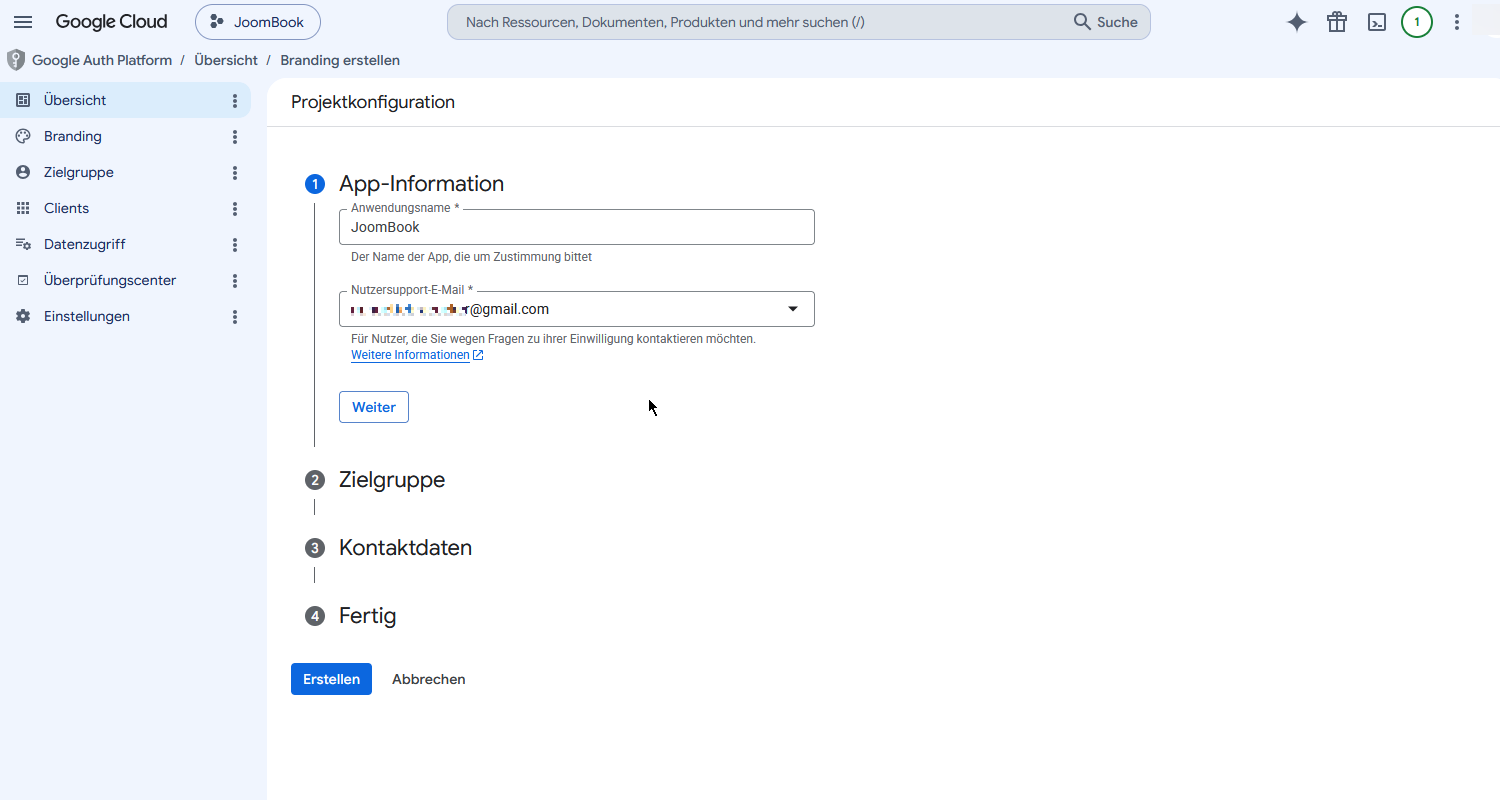
3.2 App information: Enter an app name (e.g. JoomBook) and select your email as the user support email. Continue.
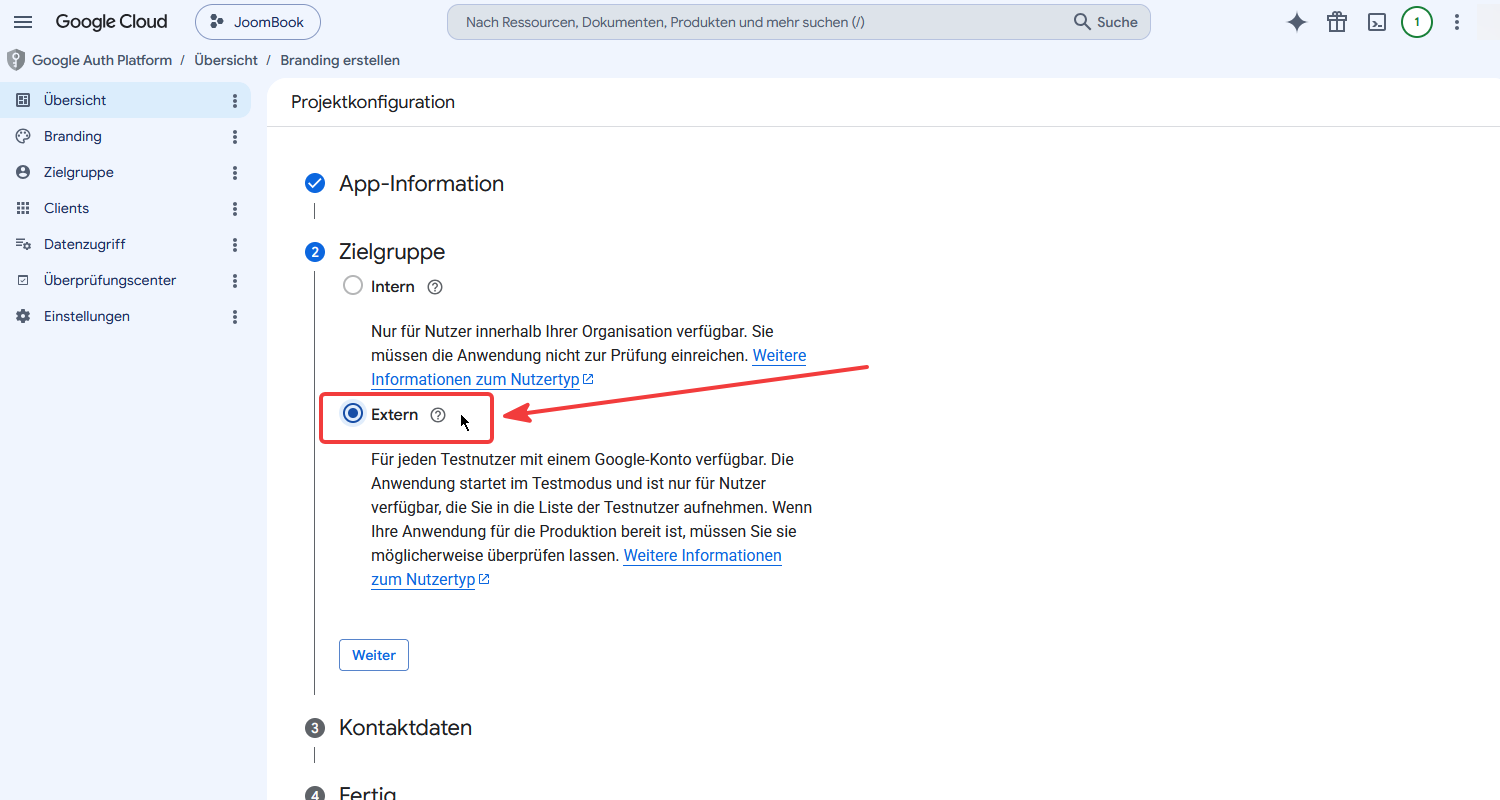
3.3 Audience: Select External. Continue.
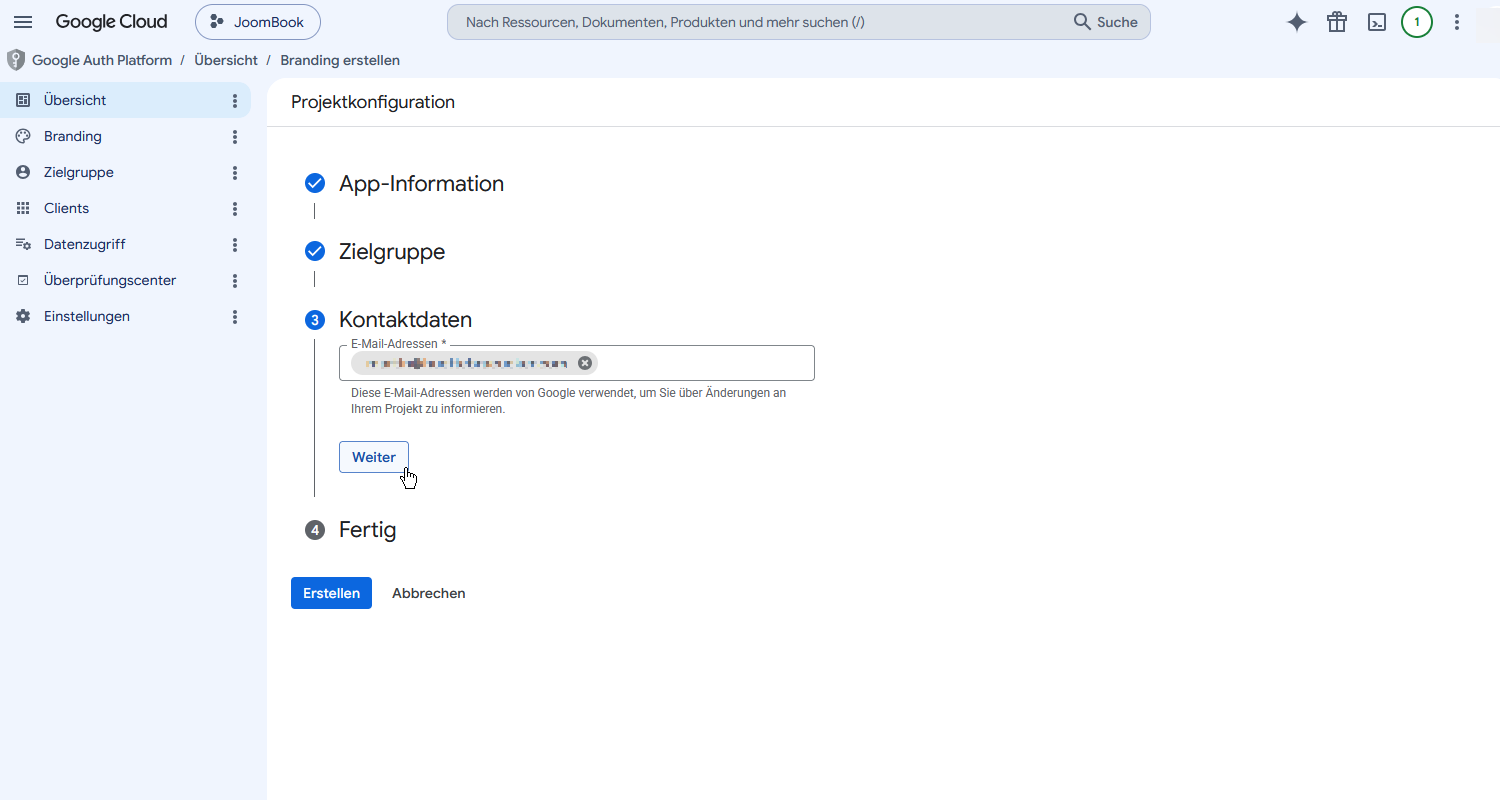
3.4 Contact information: Enter an email for Google notifications. Continue.
3.5 Step 4: Accept the user data policy and click Continue.
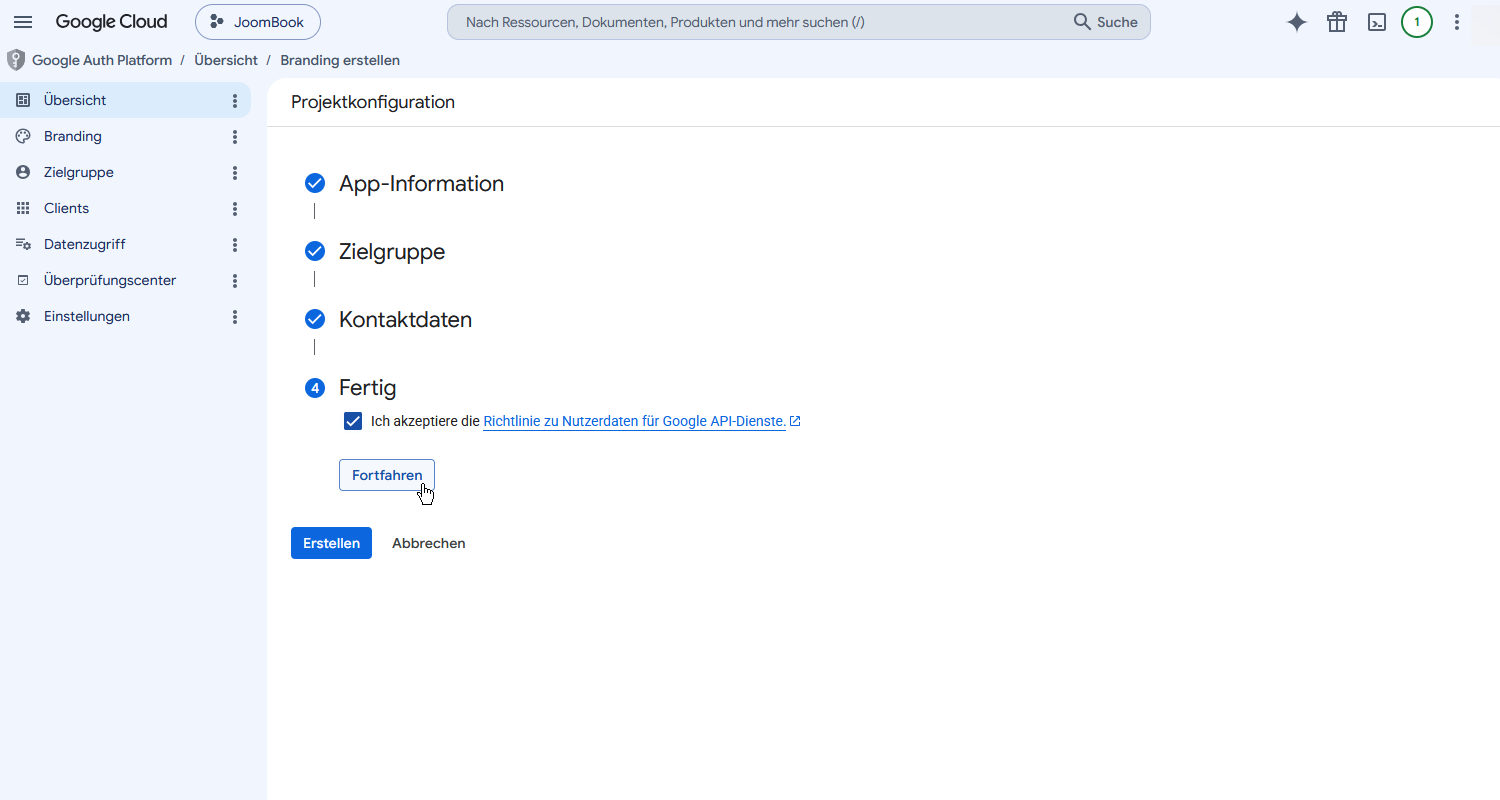
3.6 All steps are done here - now click Create.
4. Create an OAuth client
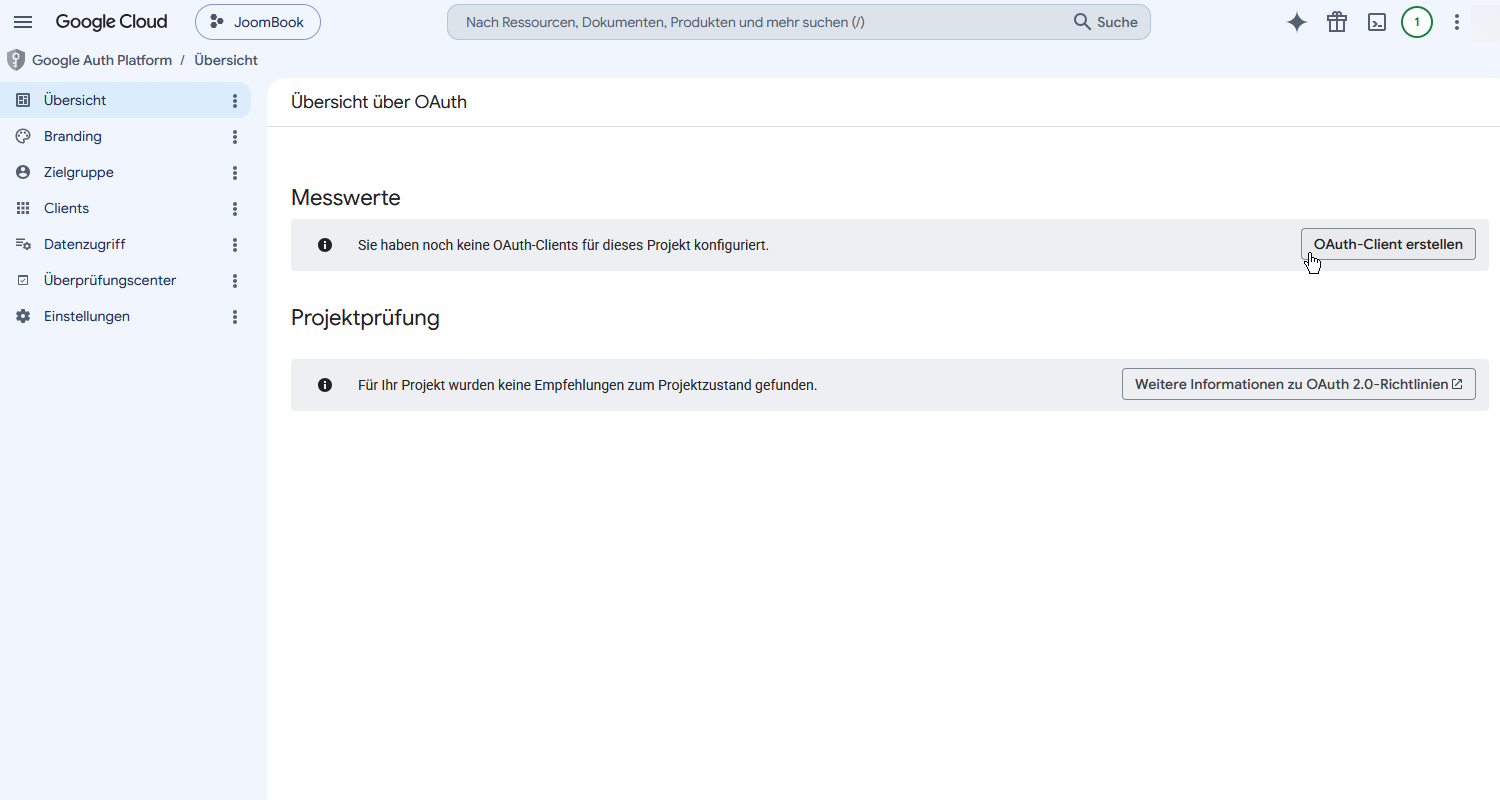
4.1 In the OAuth overview, under "Metrics", click Create OAuth client.
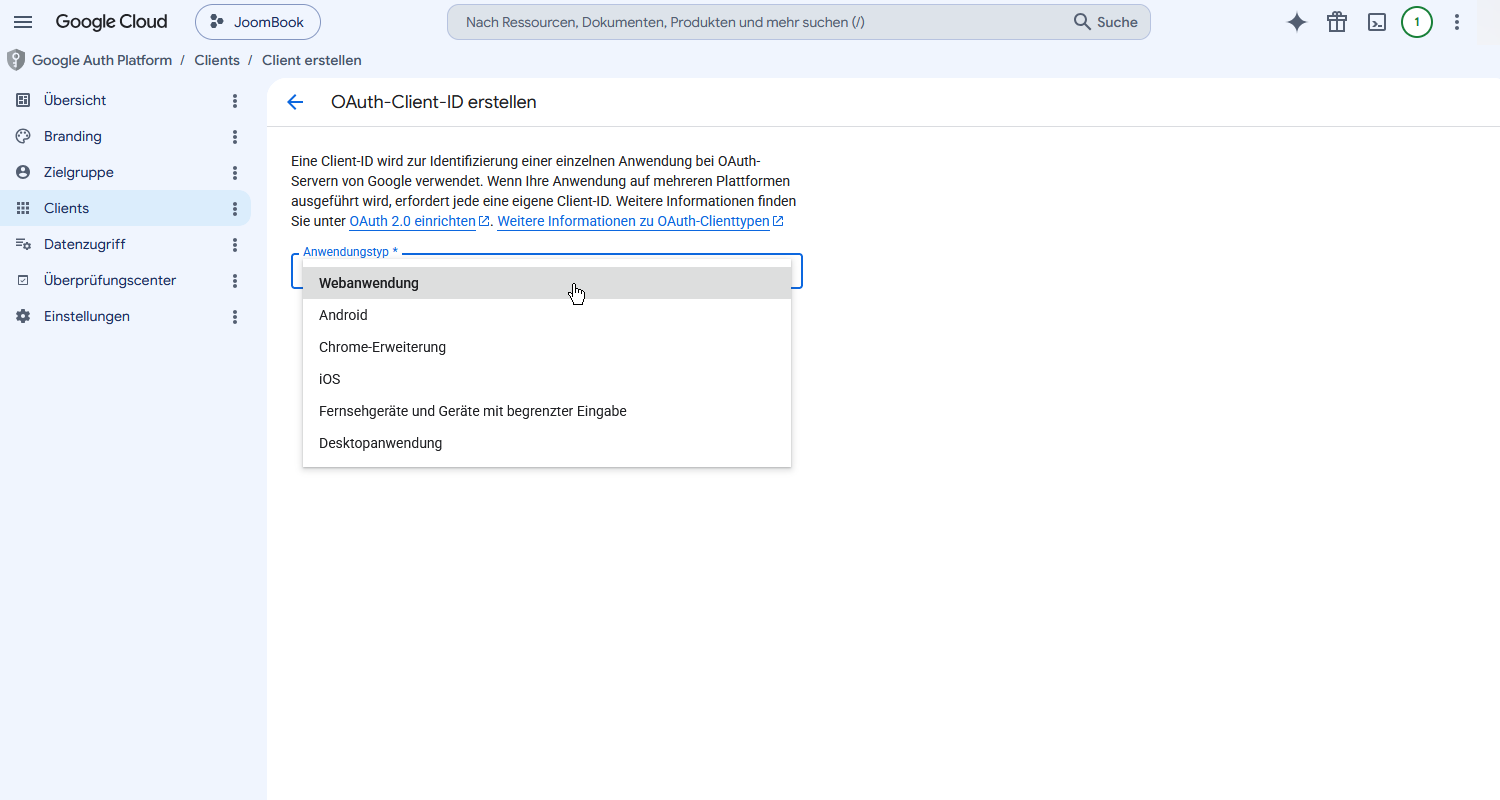
4.2 Select Web application as the application type.
4.3 Give it a name (e.g. JoomBook Web). Then scroll further down to the "Authorized redirect URIs" field.
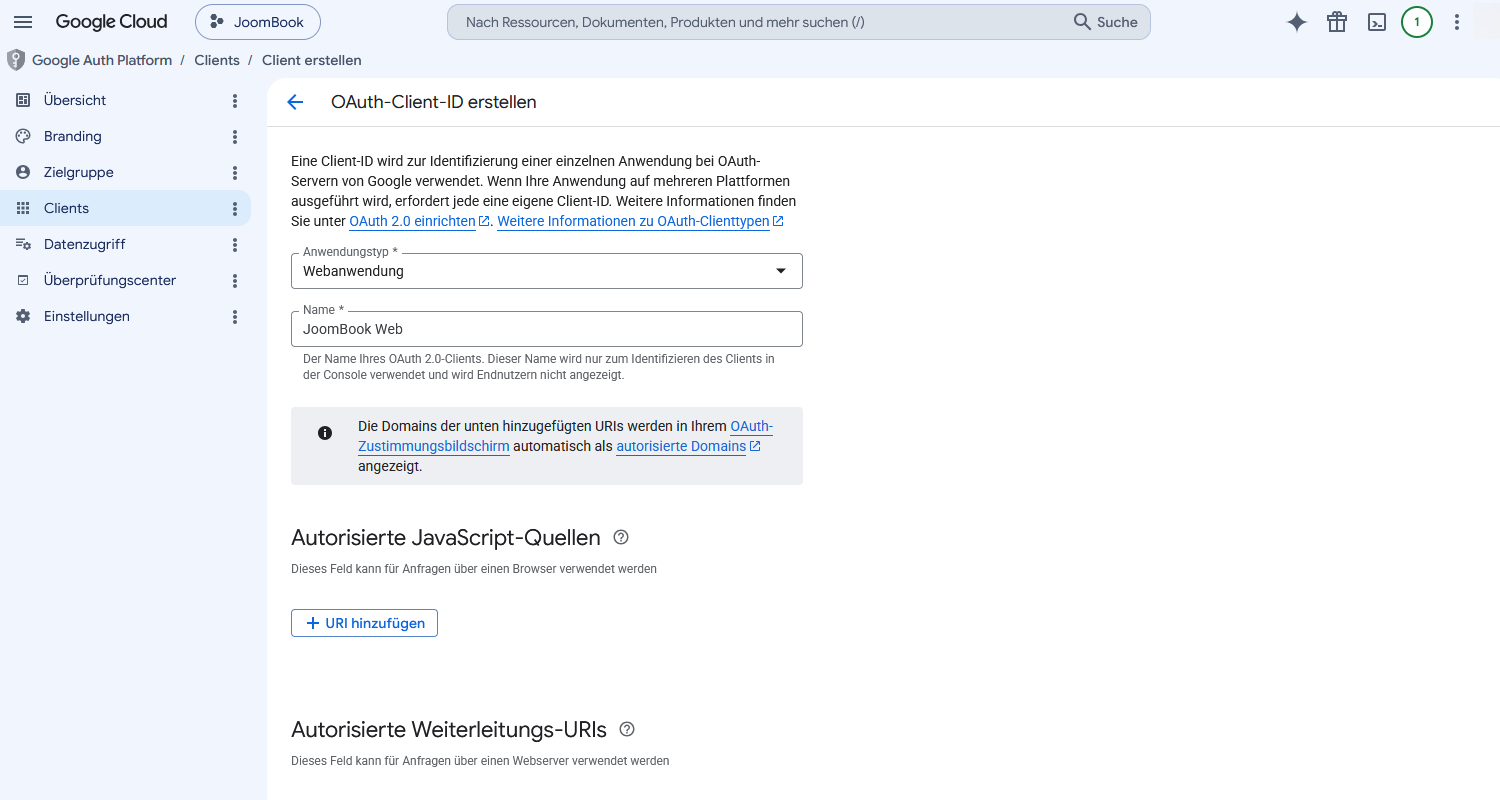
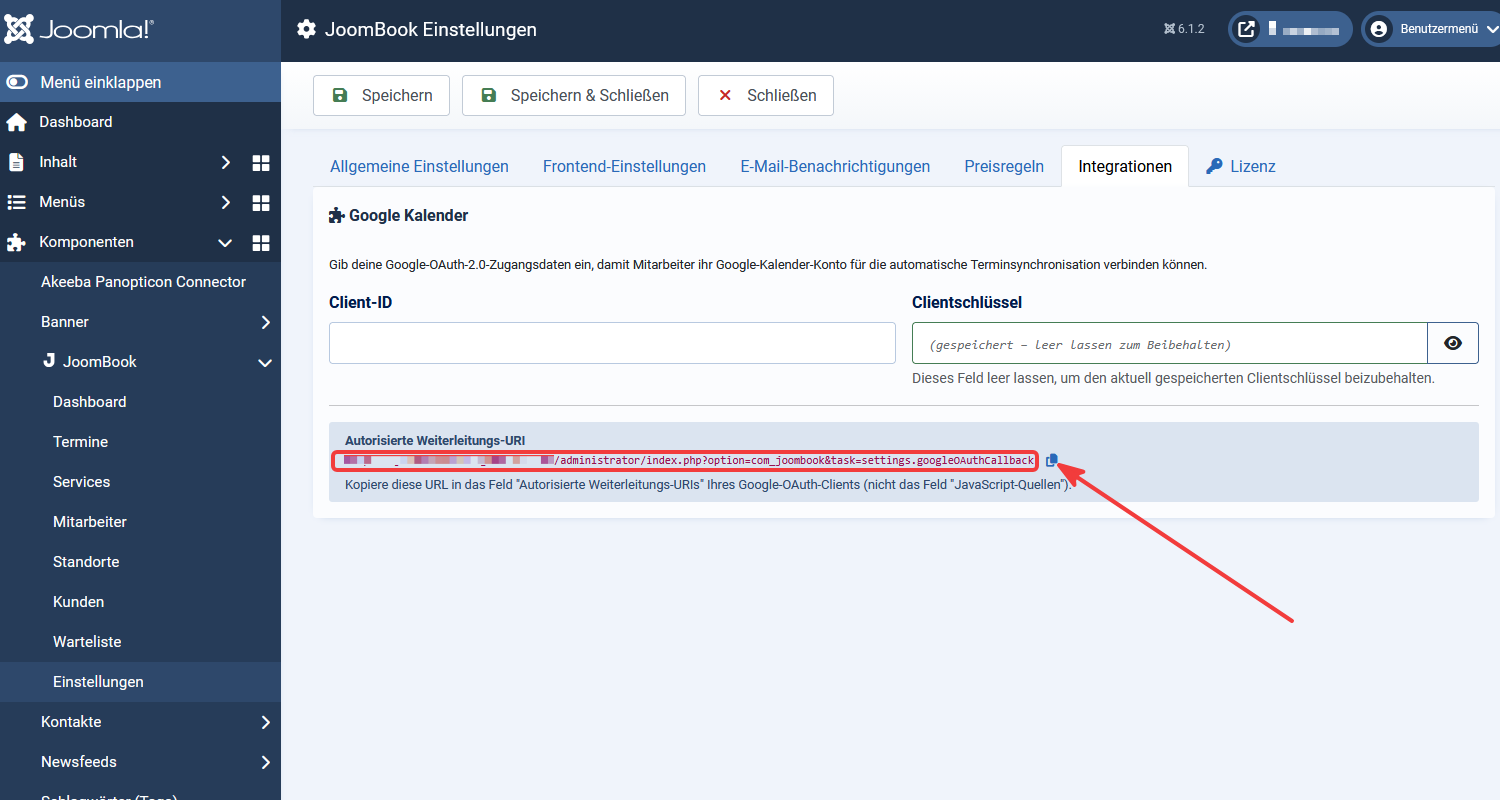
4.4 Paste this URL into Google under Authorized redirect URIs (not "JavaScript origins"!) and click Create.
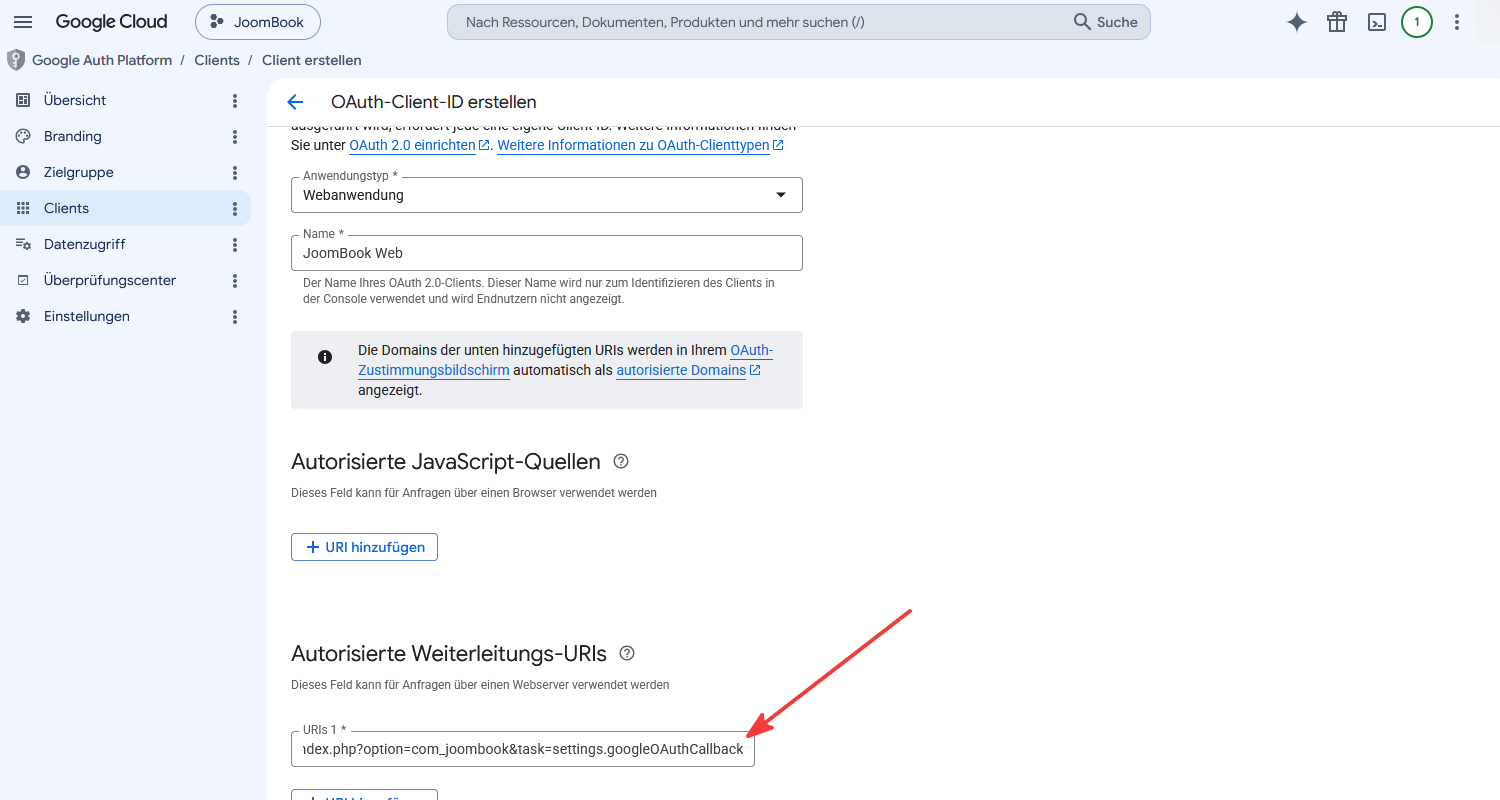
4.5 Google confirms the creation and shows your Client ID. Click OK.
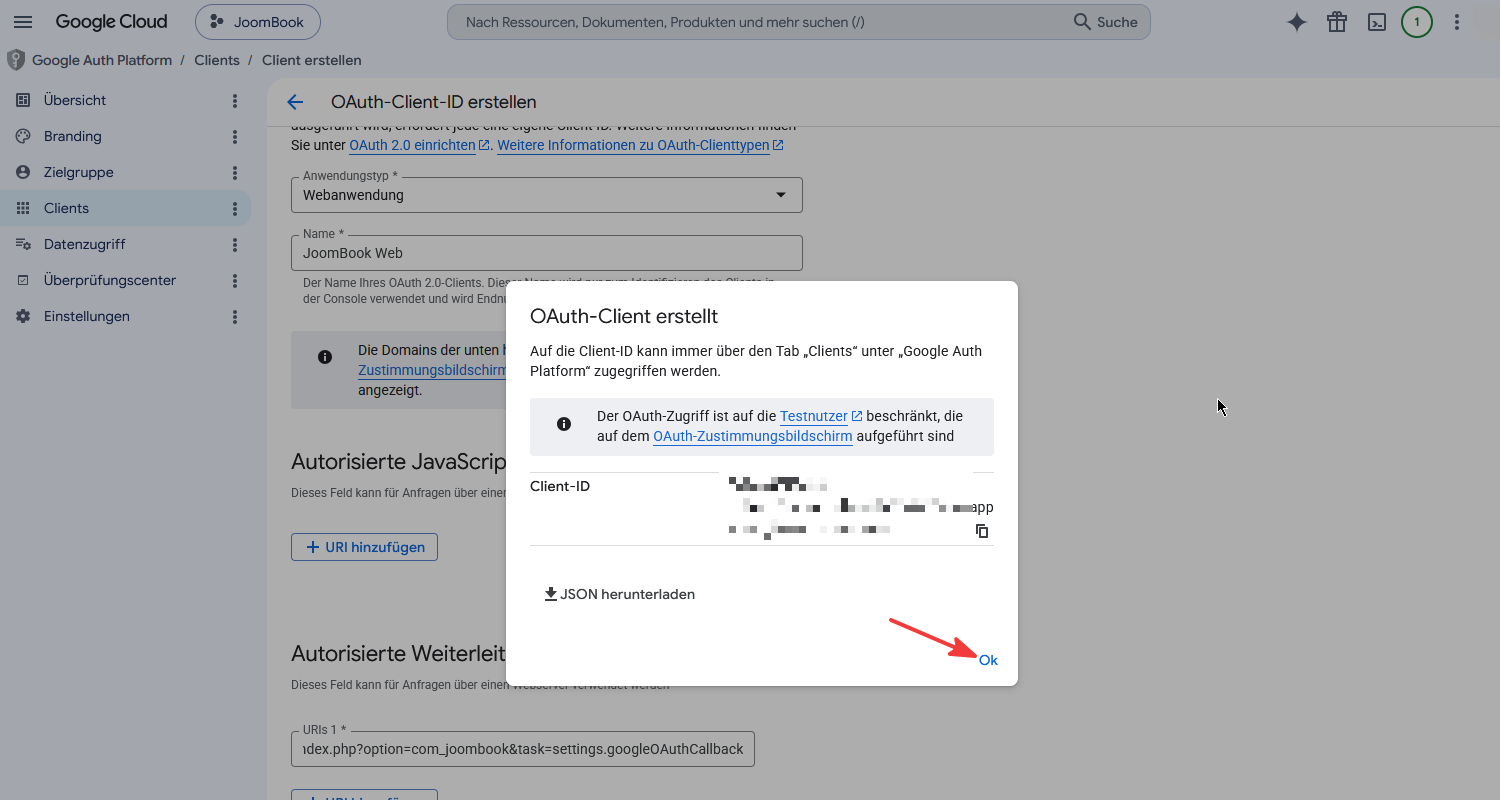
5. Copy the Client ID and Client secret
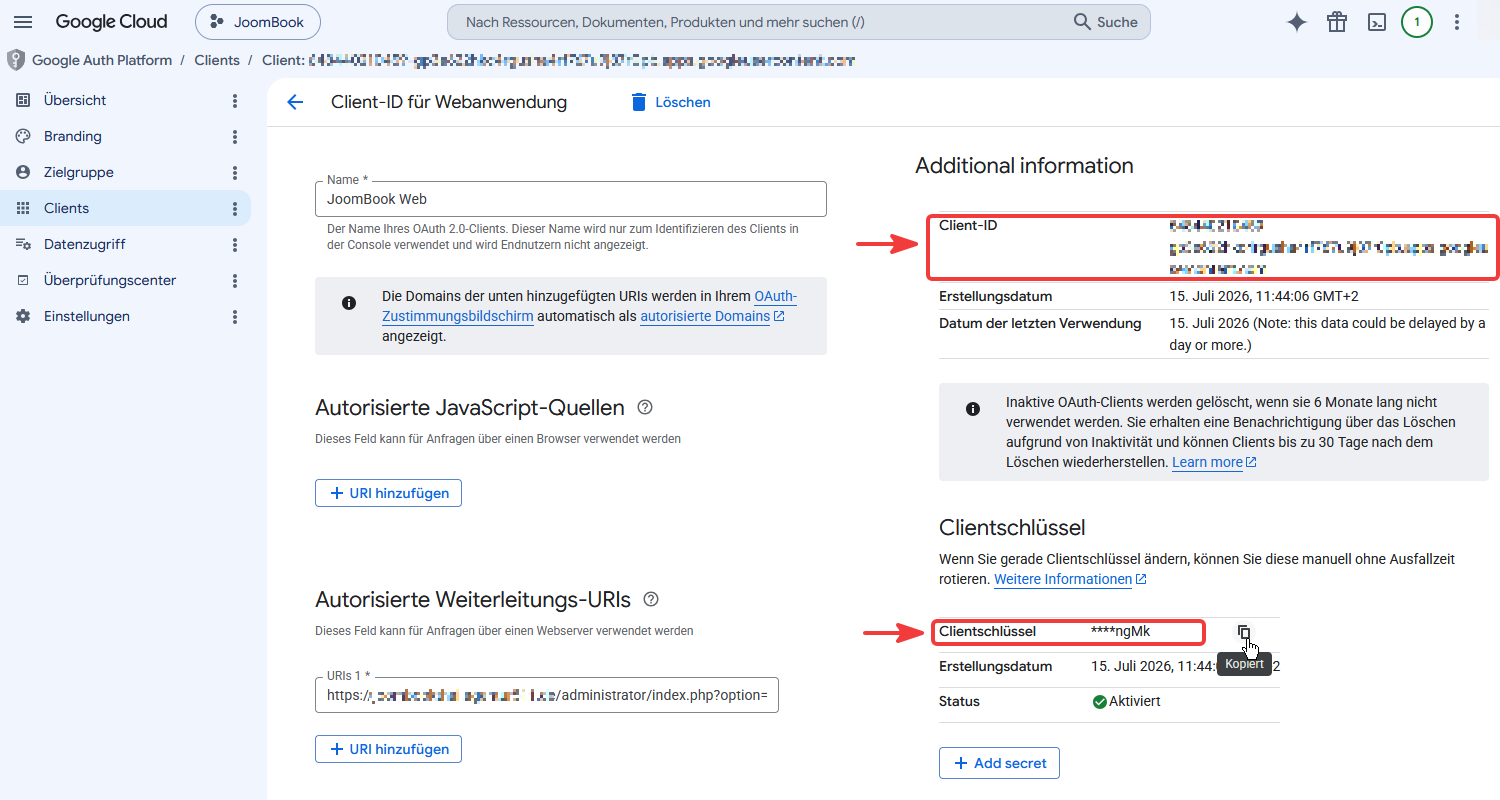
5.1 Under Clients, open your new client (e.g. "JoomBook Web").
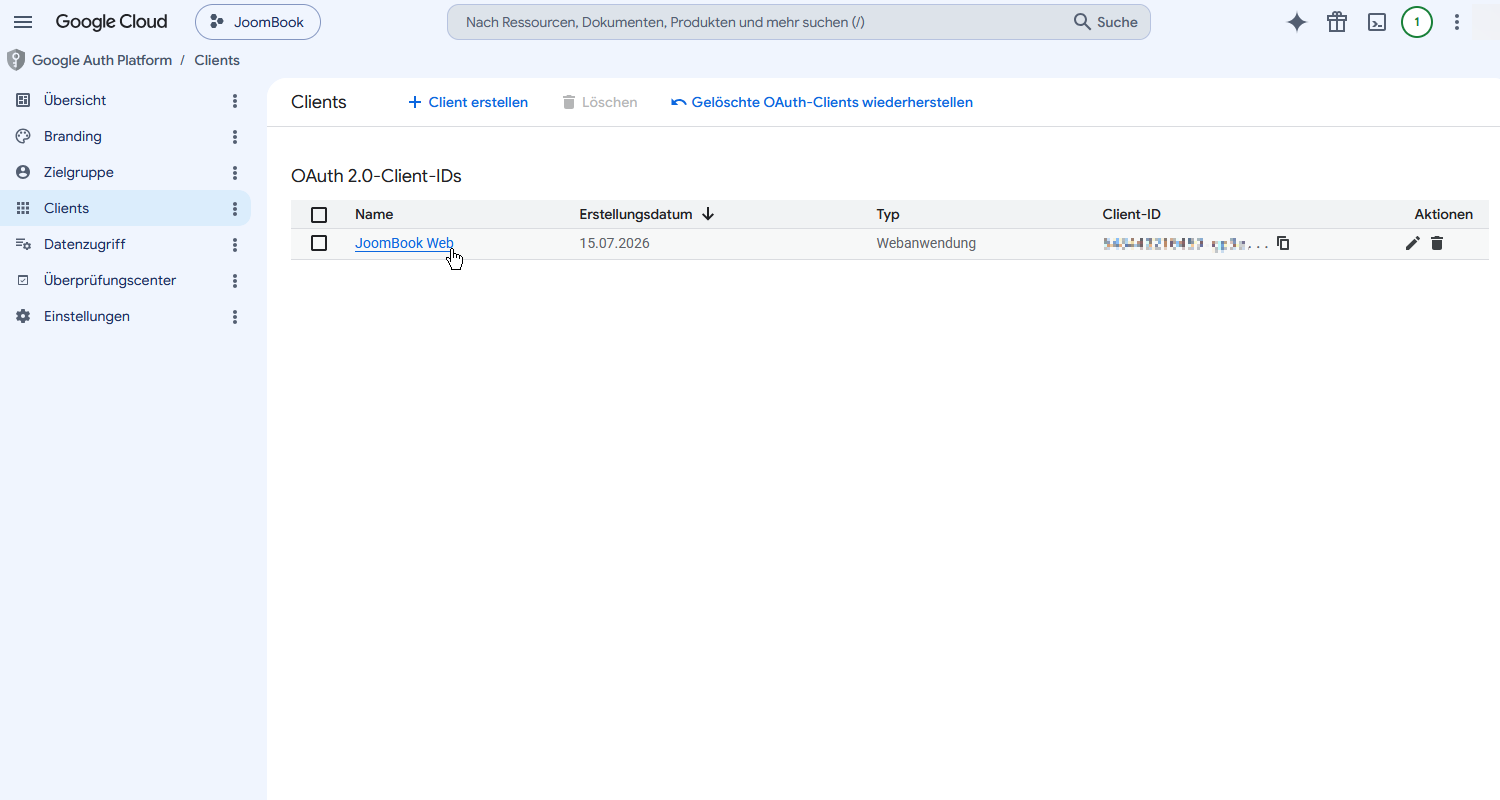
5.2 On the right you'll find the Client ID and the Client secret. Copy both - you'll enter them in JoomBook in step 7.
6. Publish the app to "In production"
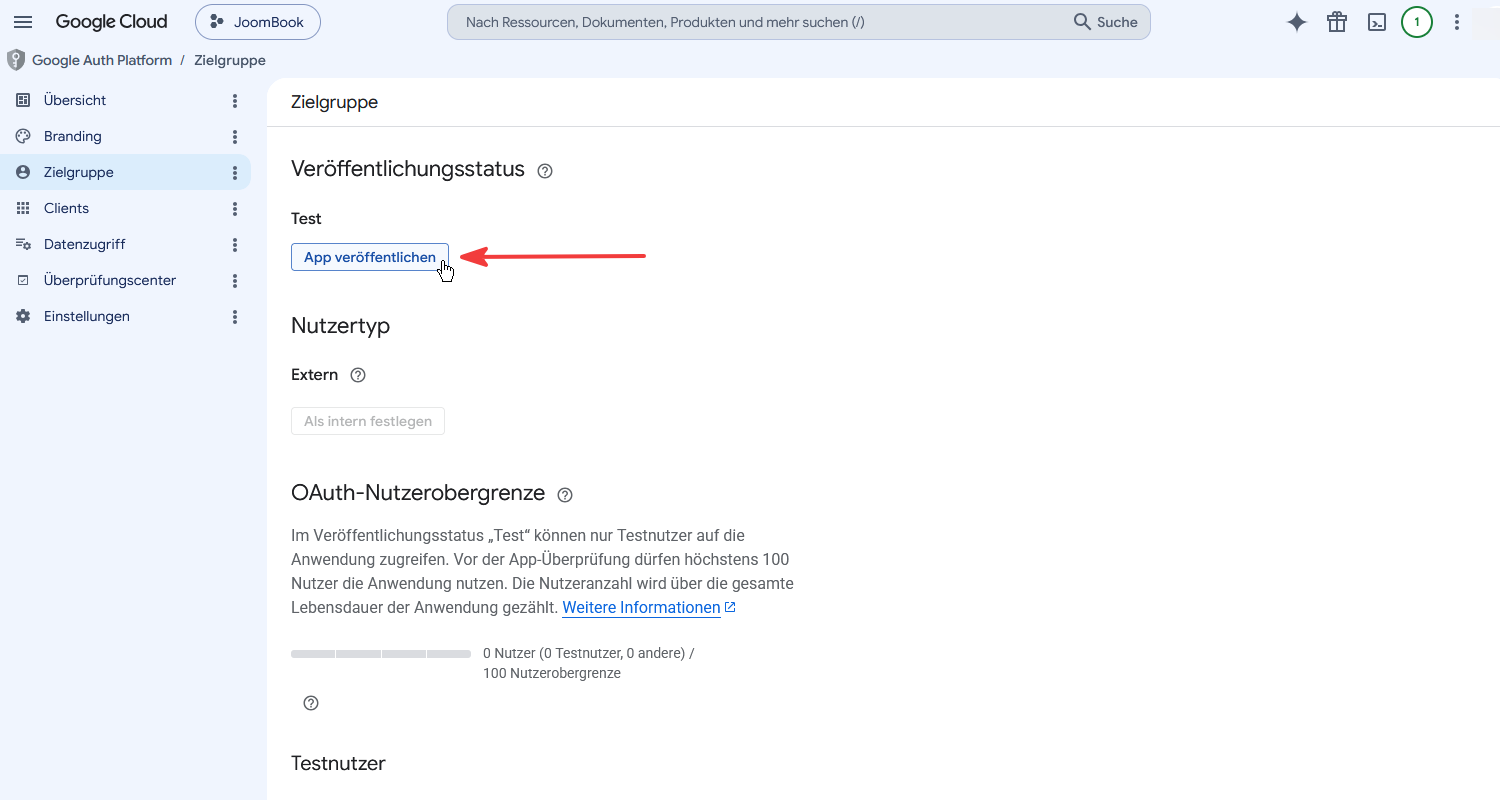
6.1 Go to Audience and click Publish app. It is fine that it says "Testing" there.
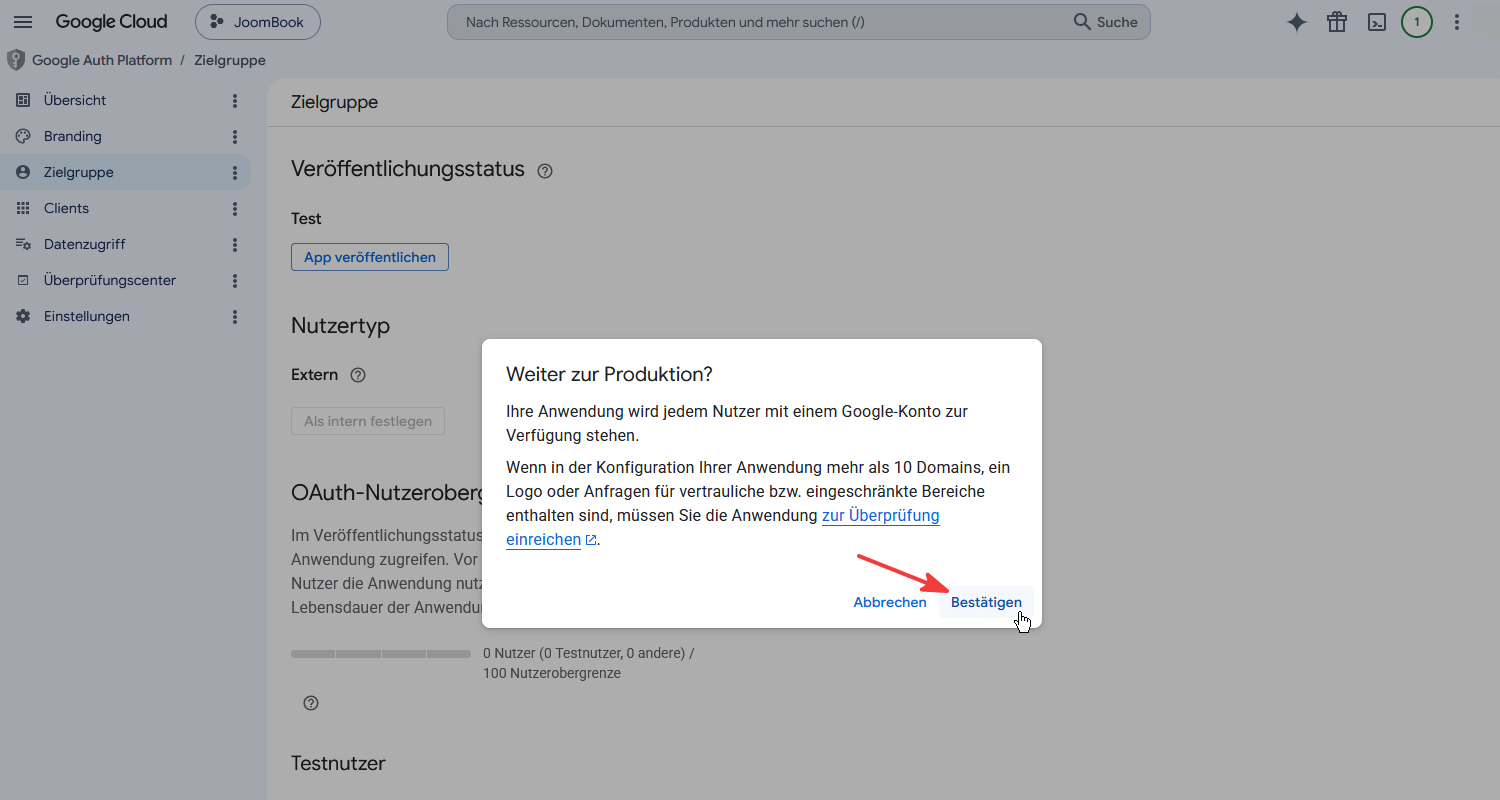
6.2 Confirm the "Push to production?" prompt with Confirm.
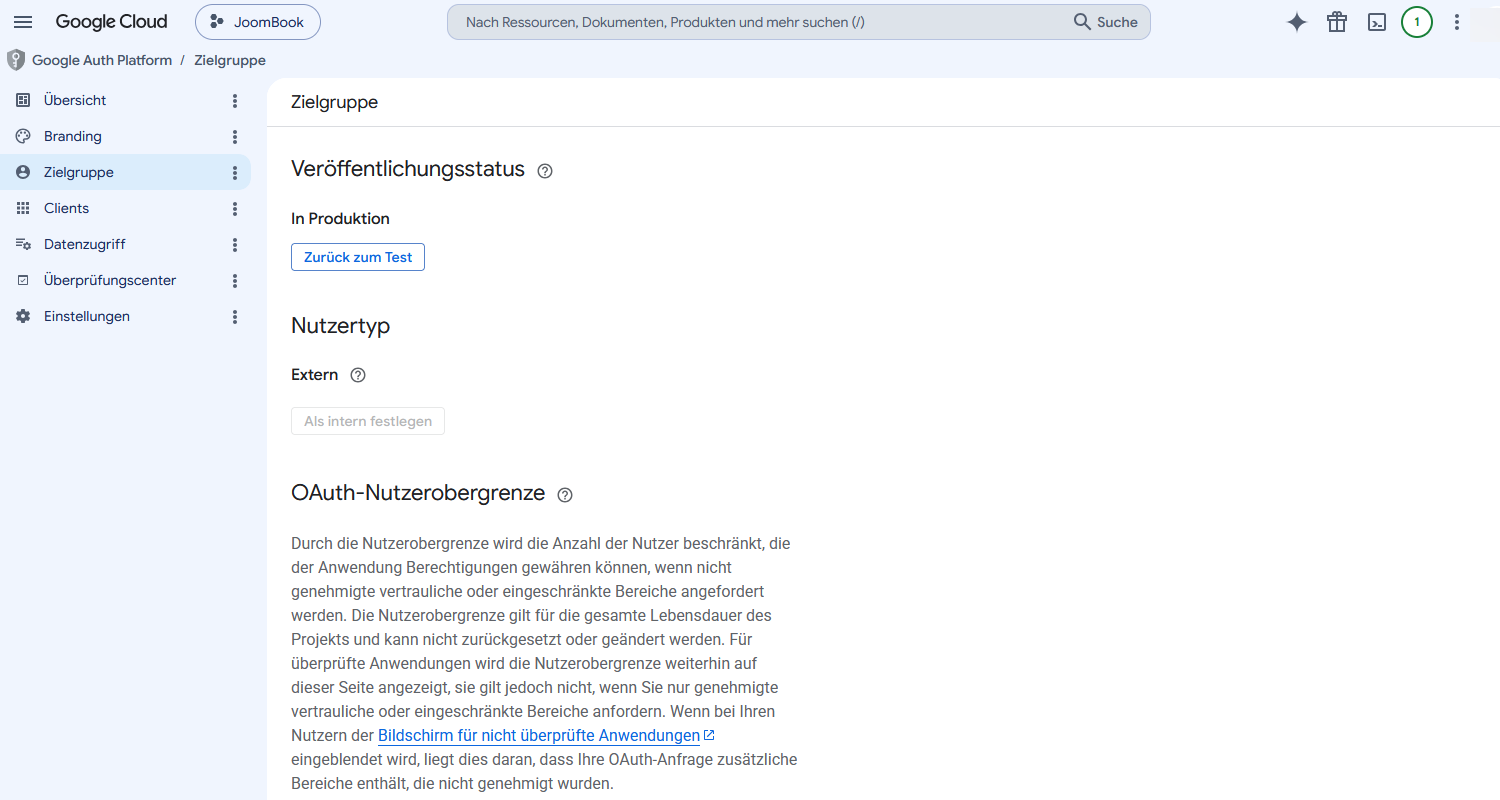
6.3 The status is now In production.
7. Enter the credentials in JoomBook
7.1 In the Joomla backend go to Components → JoomBook → Settings → Integrations, enter the Client ID and Client secret copied in step 5.2, and click Save.
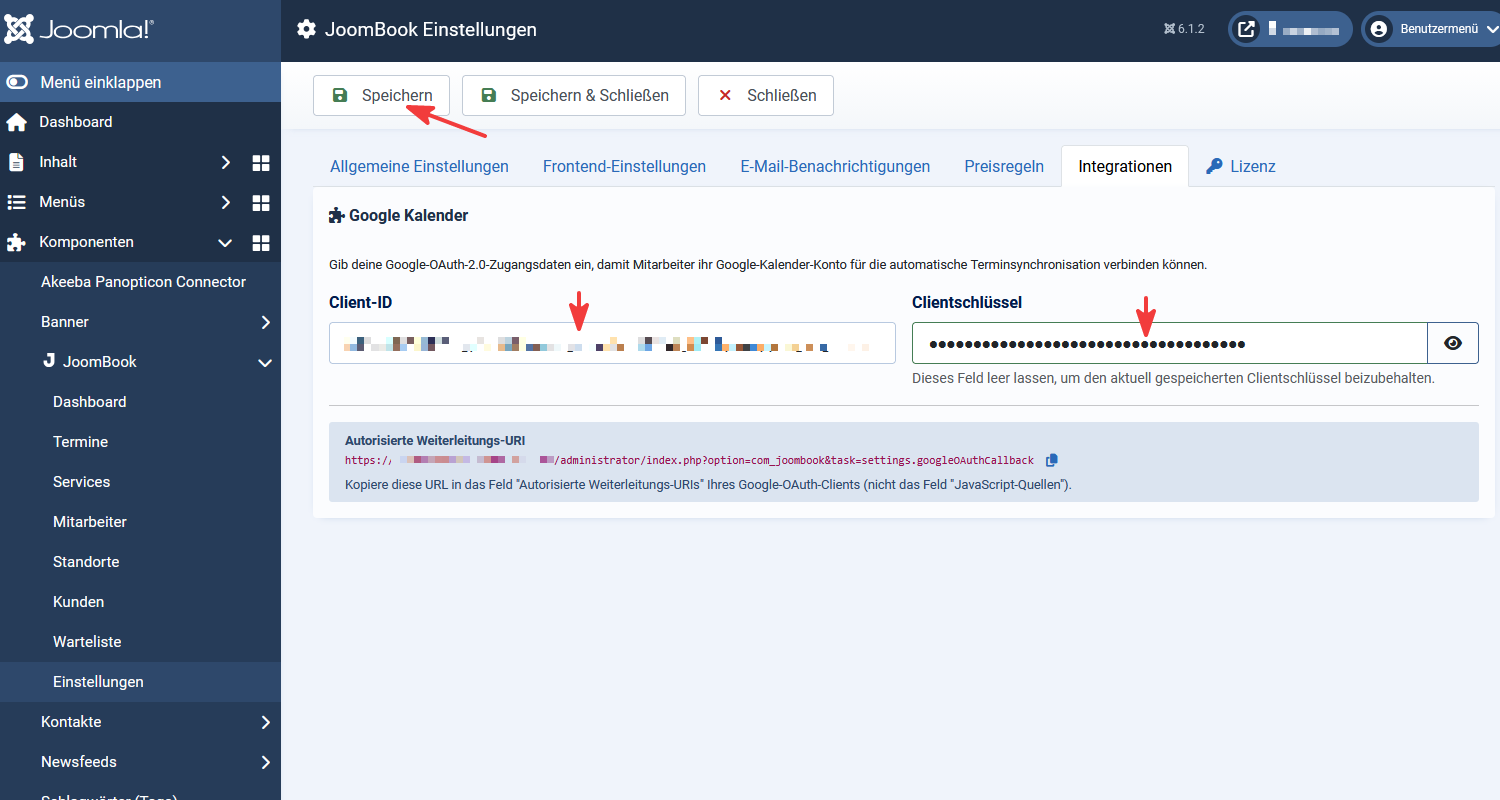
7.2 JoomBook confirms the save. The secret is now stored securely; the field stays empty the next time you open it (this is normal - leaving it empty keeps the stored value).

8. Connect a staff member with Google
Now you connect the Google Calendar account of the respective staff member. Do this per person - so every appointment lands in the right calendar.
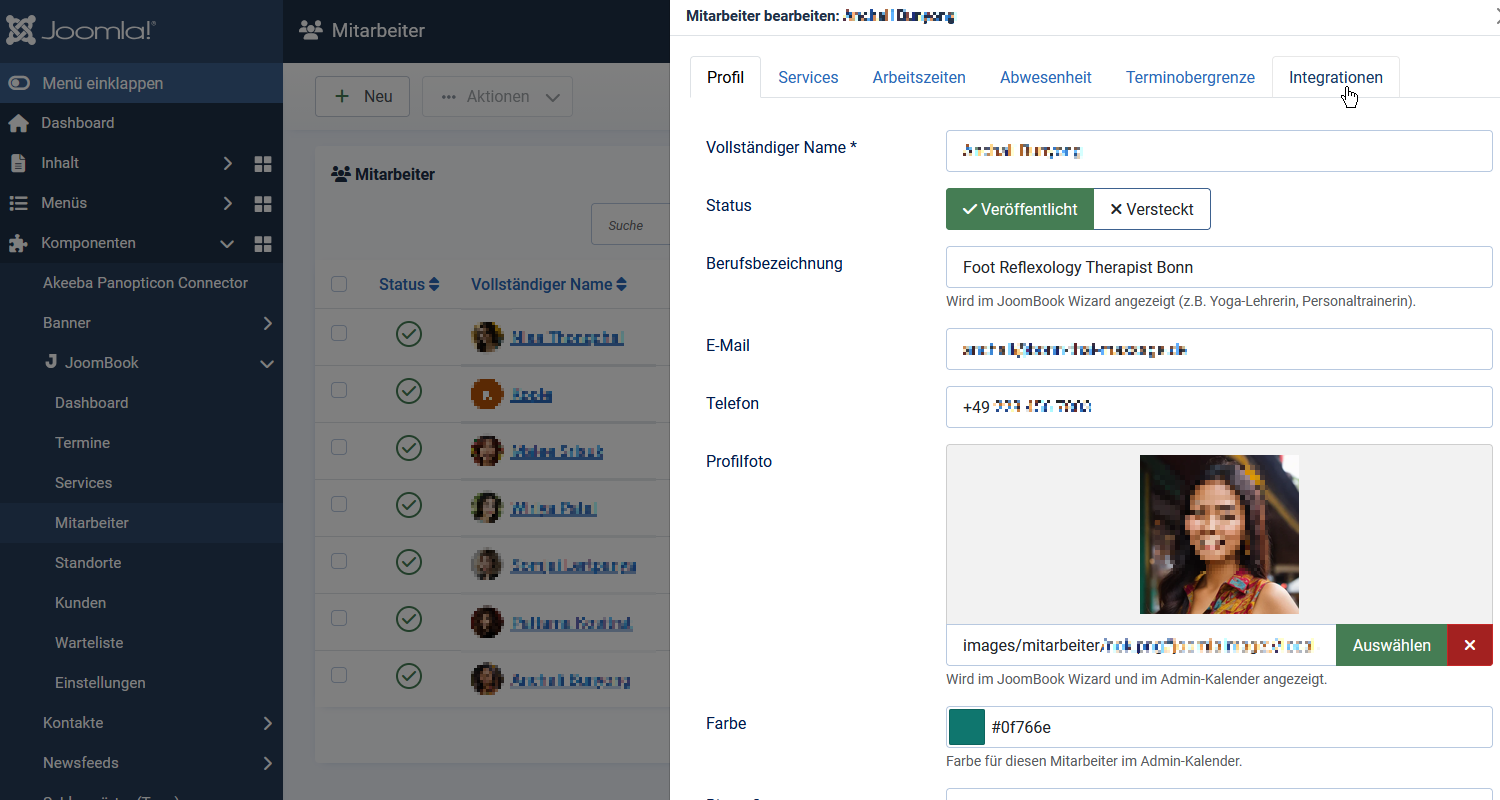
8.1 Open Components → JoomBook → Staff, edit a person and switch to the Integrations tab.
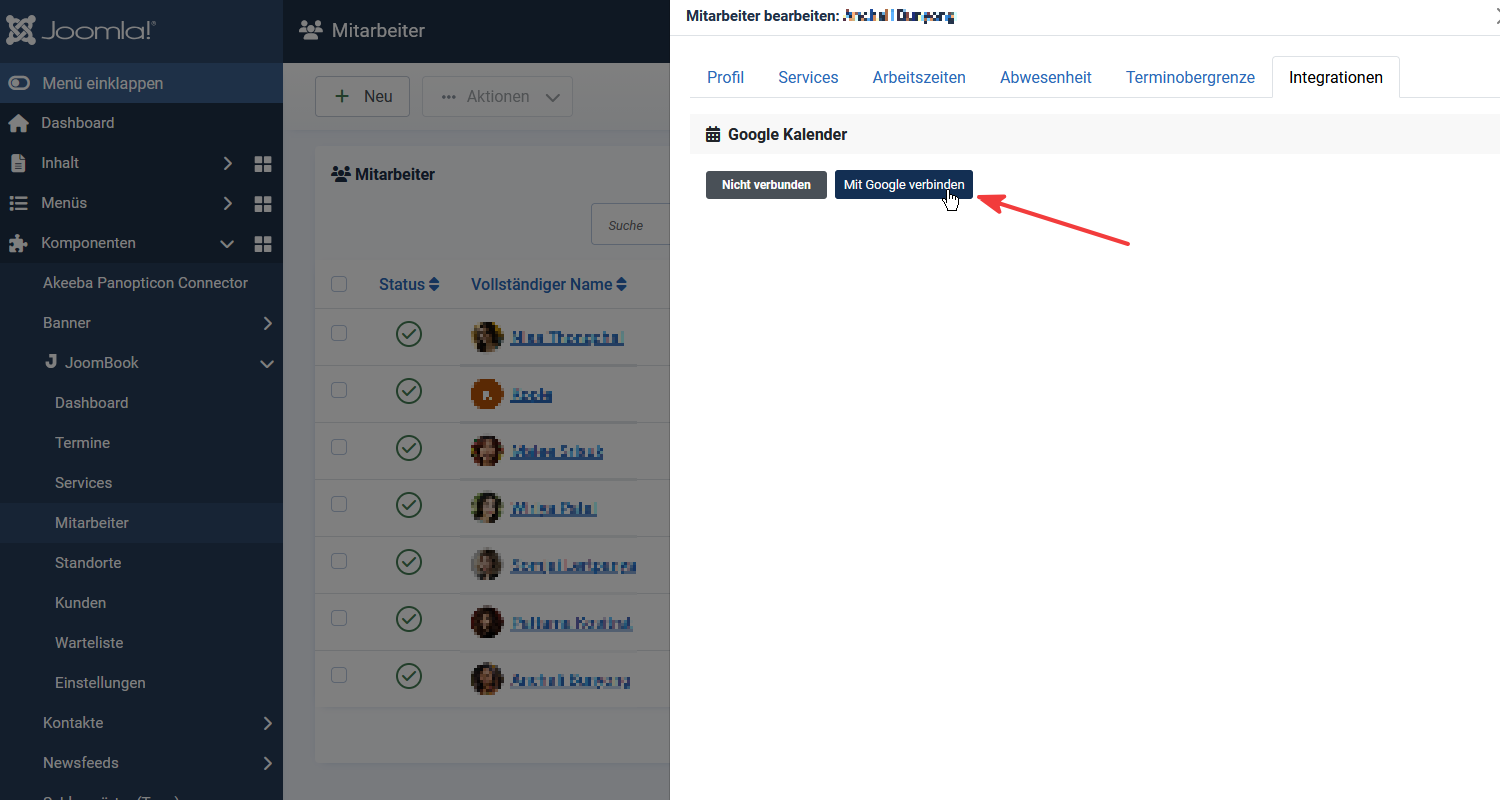
8.2 Click Connect with Google.
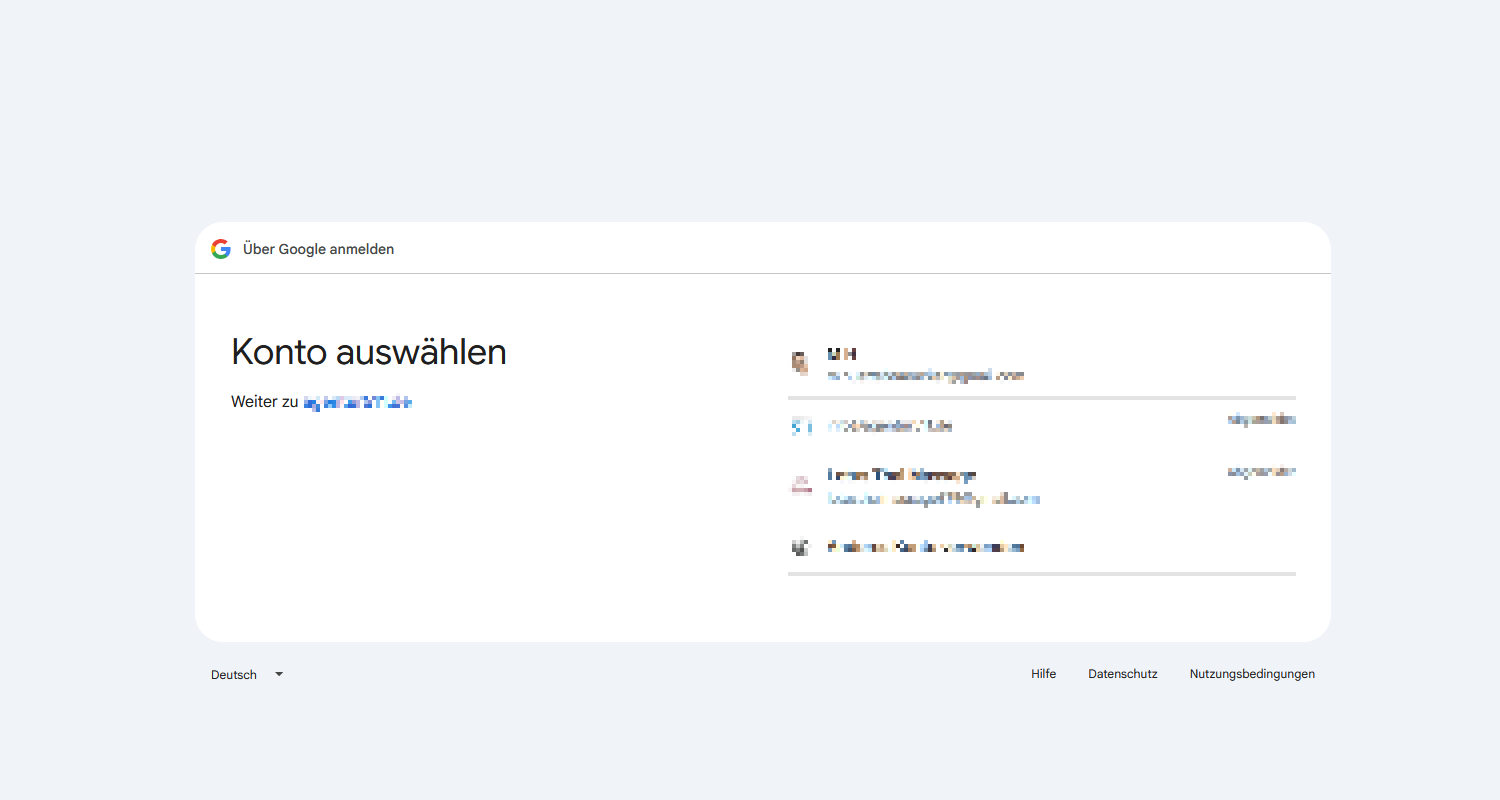
8.3 Select the Google account whose calendar should be synced.
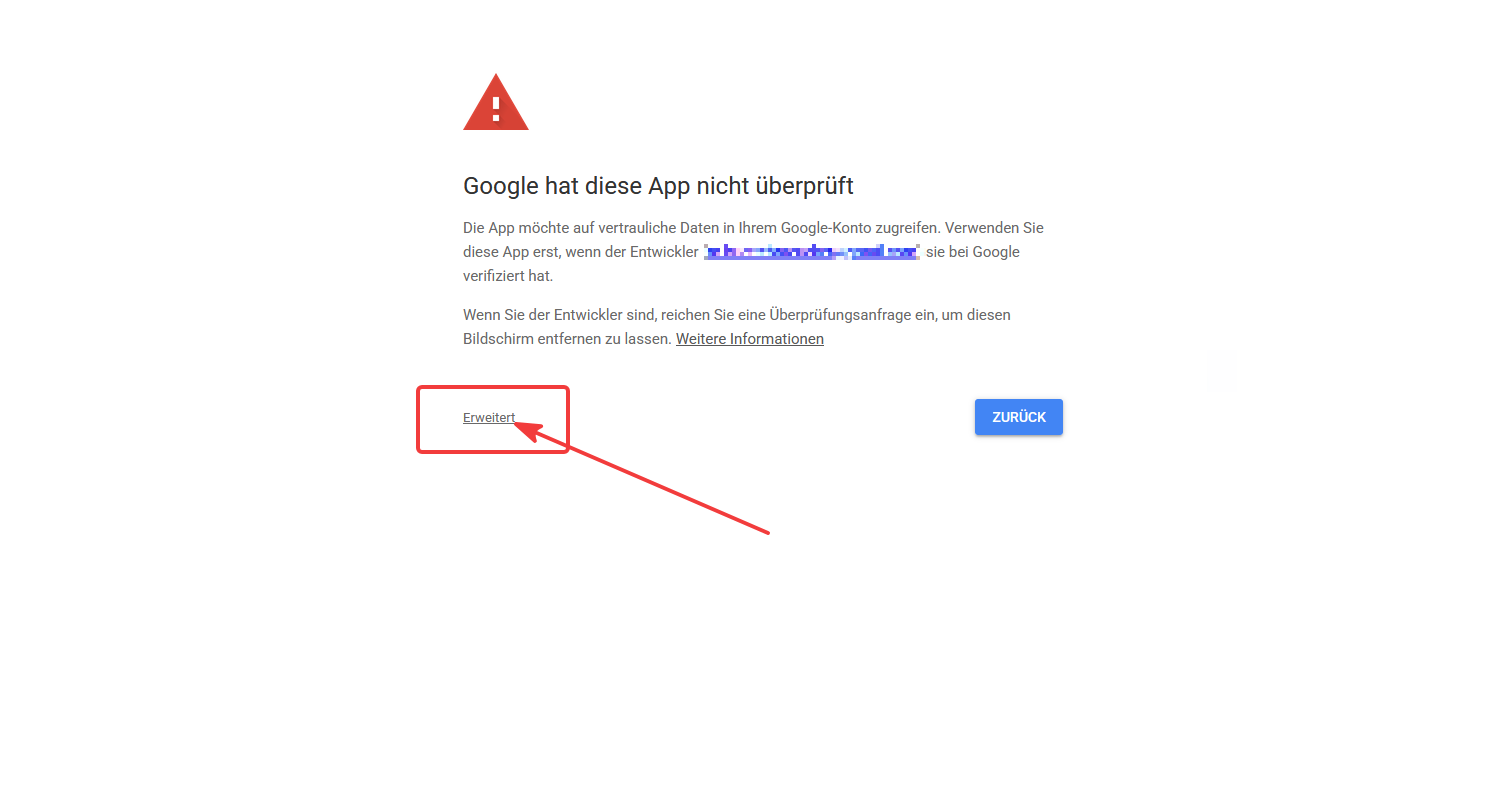
8.4 Click Advanced.
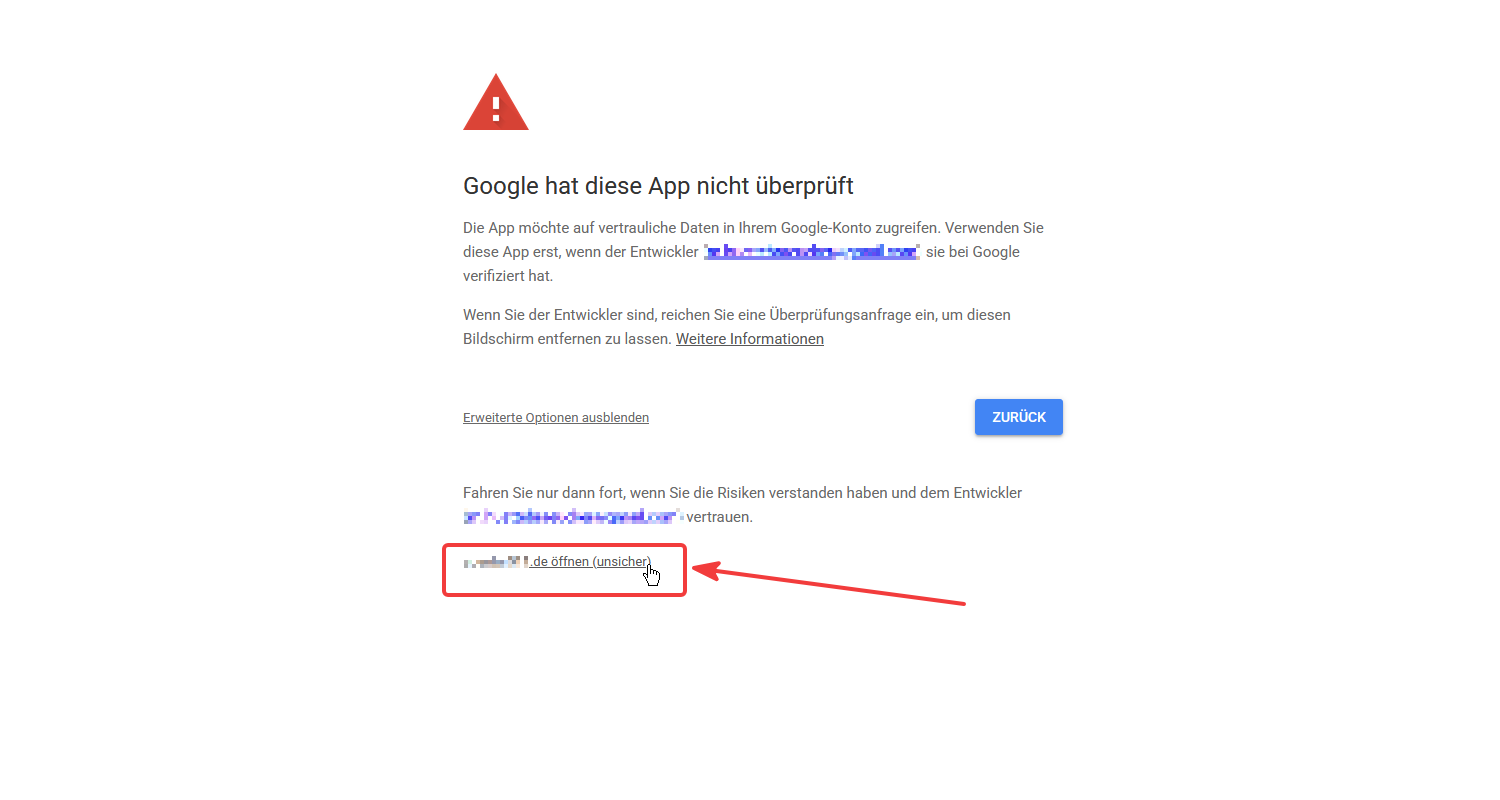
8.5 Click "Go to … (unsafe)". The "unsafe" note only refers to the app not being verified by Google - your data stays with you.
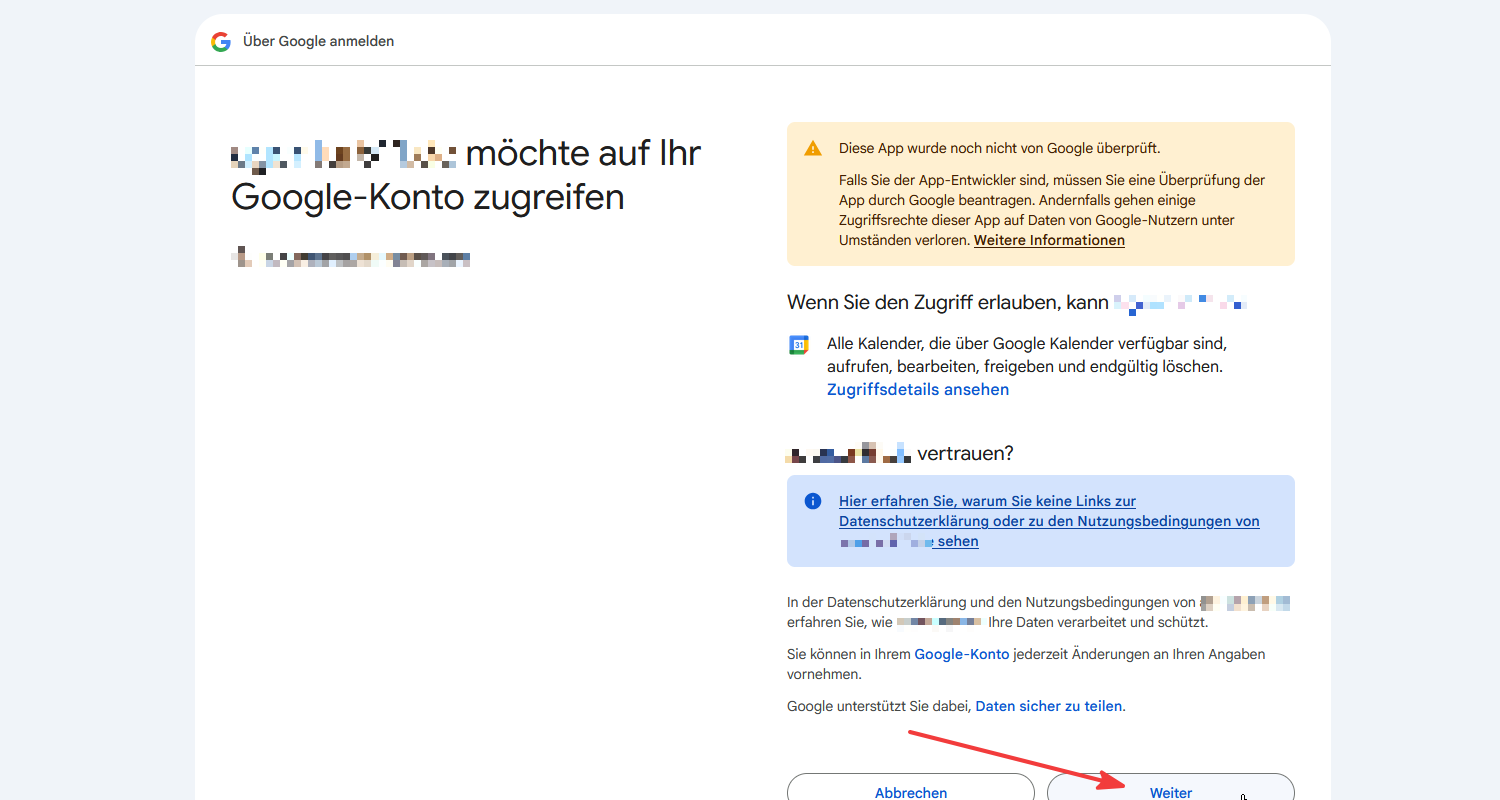
8.6 Allow access to Google Calendar with Continue or Allow.
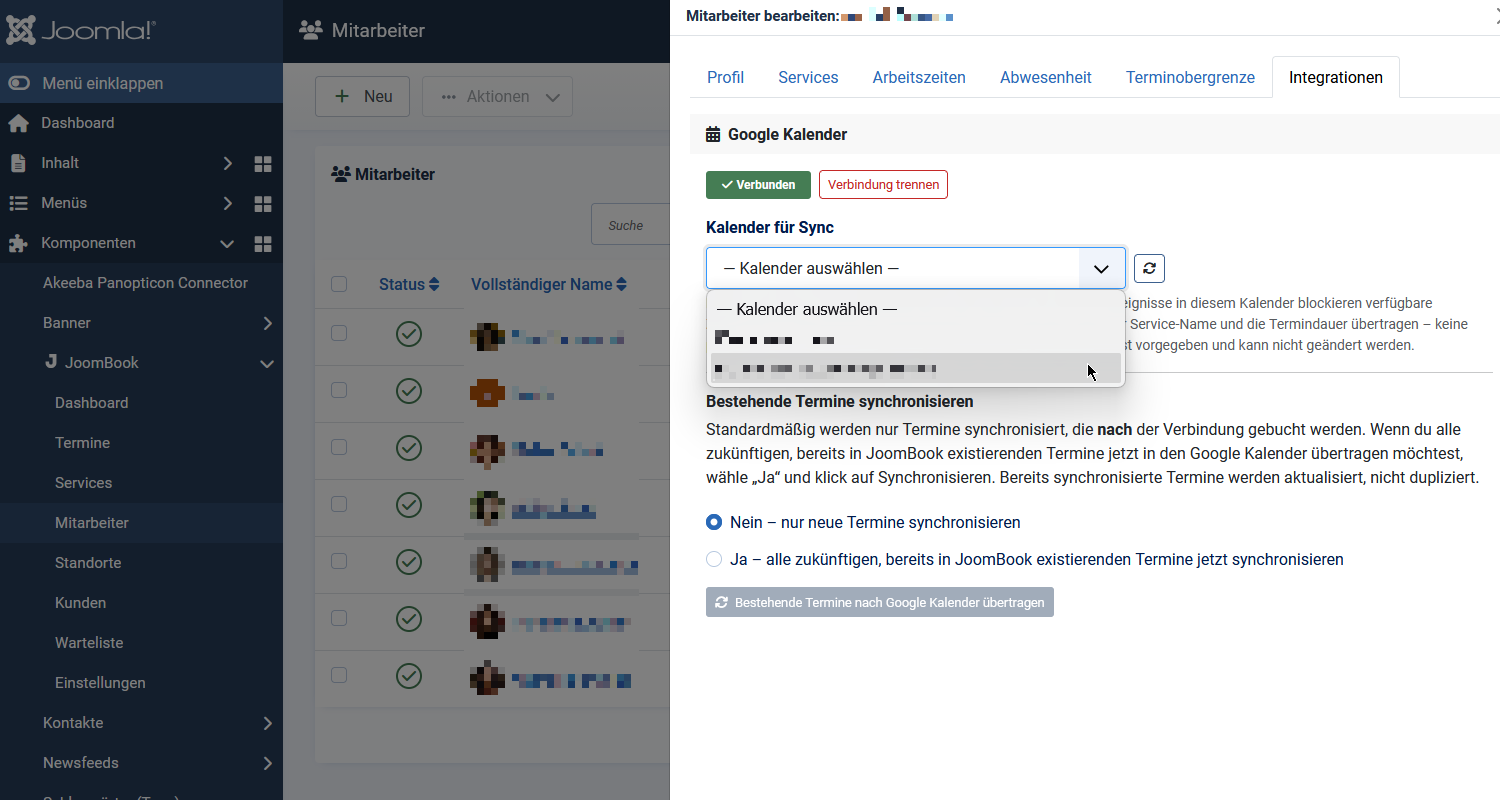
8.7 Back in JoomBook the connection now shows Connected. Under Calendar for sync select the desired calendar. Optionally you can transfer existing appointments once ("Sync existing appointments"). You can disconnect at any time via Disconnect.
9. Set the time zone correctly
UTC while your actual time is, say, Central European Summer Time, Google blocks end up shifted by several hours.How to set it correctly:
- Joomla backend → System → Global Configuration.
- Server tab → Server Time Zone field.
- Set it to your local time zone, e.g.
Europe/Berlin- notUTC. - Save. Google blocks are then shown at the correct time.
By the way, the backend calendar shows appointments correctly even with a wrong server time zone (it uses the browser time) - the error only affects the blocks imported from Google. That's why it's easy to miss. So be sure to check this setting.
10. Test: sync an appointment
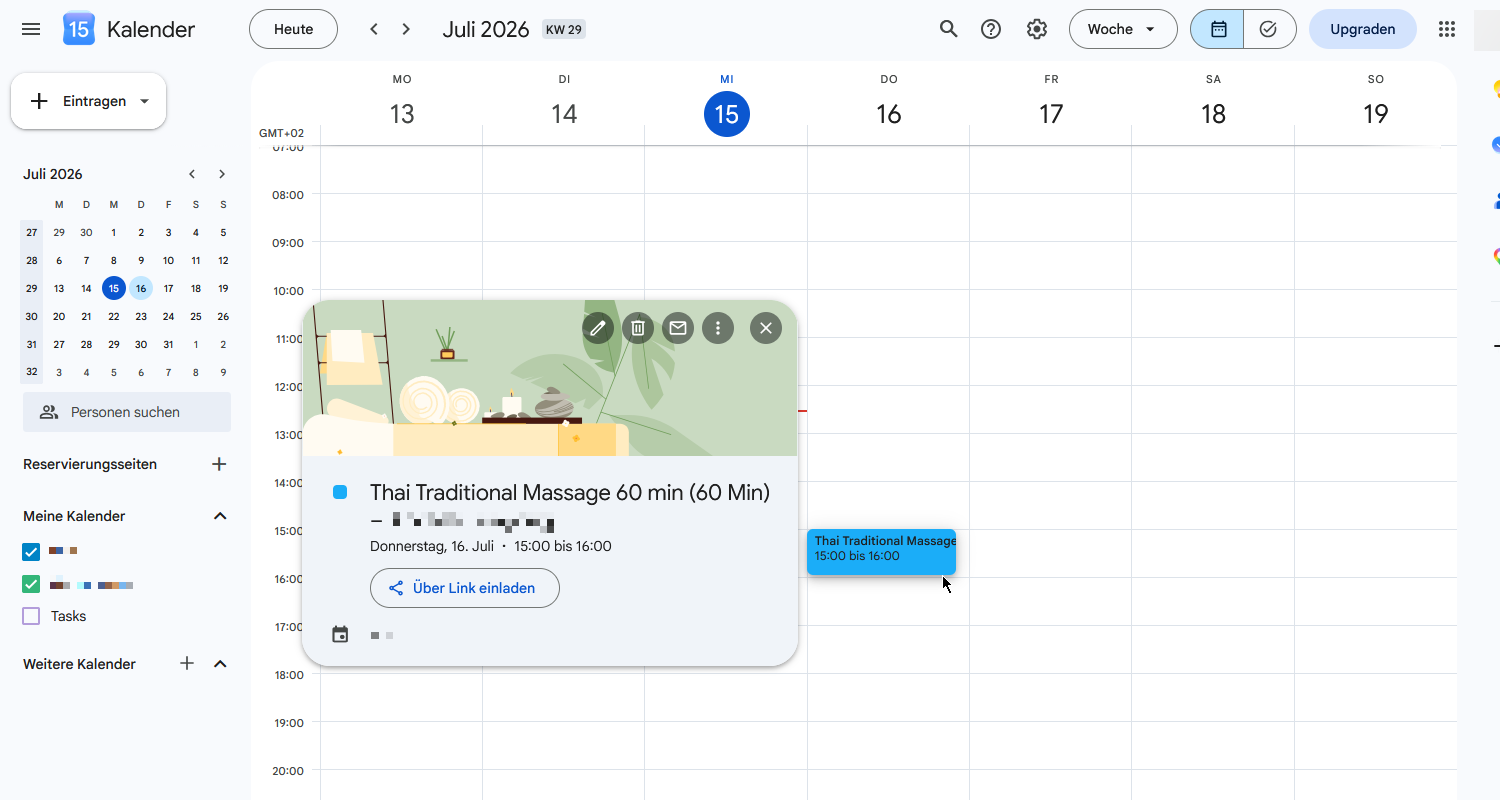
Create a test appointment in JoomBook (or book one via the wizard). After the next sync run it appears in the connected Google Calendar - including the service name and duration.
11. GDPR note: what is transferred?
Only the service name, appointment duration and staff member name are transferred - no personal customer data (no customer names, email addresses or phone numbers) and no location name. This anonymised transfer is fixed.